The User Access and Permissions Assistant is a free, Salesforce Labs-published AppExchange app that auto-generates a Permission Set from an existing Profile — genuinely useful for validating a Profile-to-Permission-Set migration independently of your own manual build. But installing it is not a two-click AppExchange affair. It requires a real chunk of OAuth plumbing, and one specific error stalls most people at the first authentication attempt with no obvious next move.
This is the full sequence, in order, including the error and its actual fix — which has nothing to do with the values you typed.
What you're installing
What This Tool Actually Does
Once installed, the app gives you four native tabs:
| Tab | What it does |
|---|---|
| Analyze | Inspect effective access for a User, Permission Set, or Permission Set Group |
| Converter | Auto-generate a Permission Set from an existing Profile |
| Report | Broader visibility into permission assignments across your org |
| Manage | Ongoing administration of the tool itself |
💡 Worth knowing before you start
Analyze does not accept a Profile as a target — only Users, Permission Sets, and Permission Set Groups. If you're trying to audit a Profile directly, you want Converter, not Analyze. Easy to assume otherwise going in.
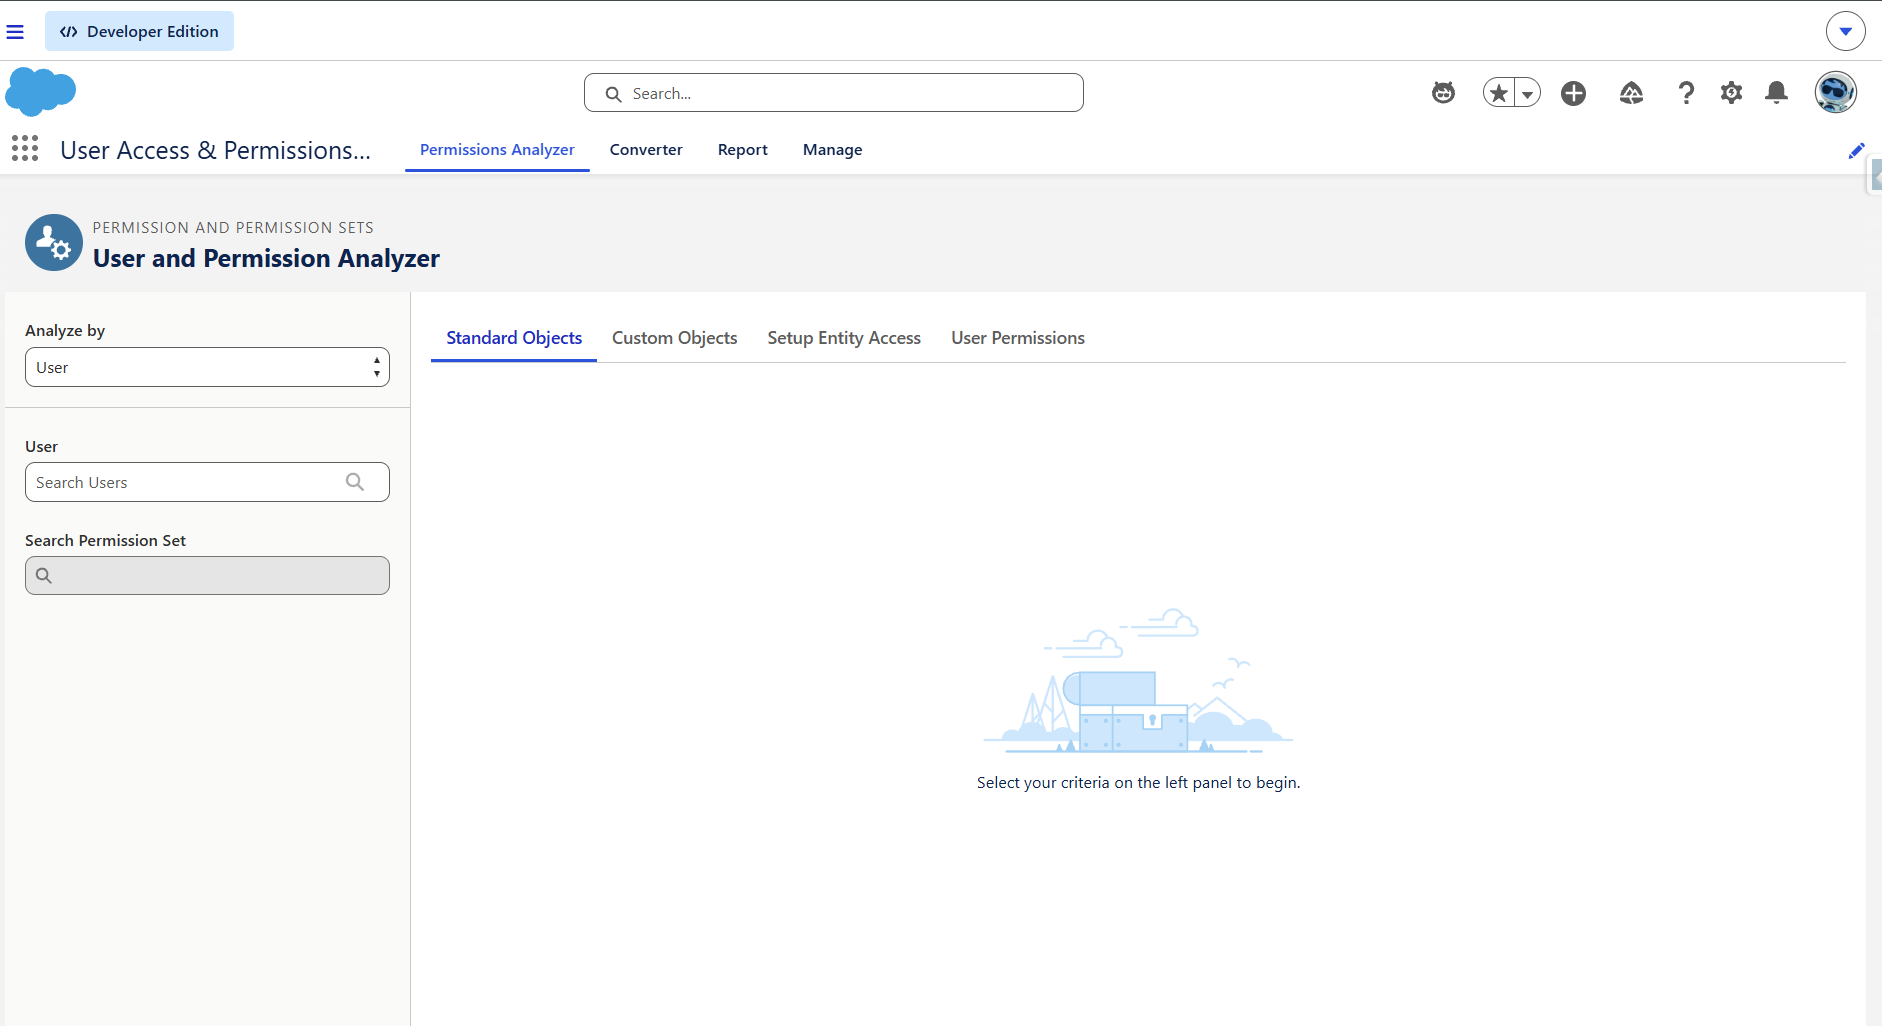
User Access and Permission Assistant from App launcher
It's also not in Setup. Searching Setup Quick Find for "User Access and Permissions Assistant" comes up empty — it's an installed package, and once installed, it lives in the App Launcher, not Setup.
The part before the install
Before You Install: Enable the Tooling API
This is the part that catches people off guard. The app needs to call Salesforce's Tooling API on your behalf, which means before installing anything from AppExchange, you have to build a small OAuth chain yourself: a Connected App, an Authentication Provider, a Named Credential, and a couple of Permission Sets. Every field value below is taken directly from Salesforce's own official documentation.
- Name:
UAPA Tooling API(or your own descriptive naming) - Enable OAuth Settings; Callback URL (placeholder):
https://login.salesforce.com - OAuth Scopes: Full access (full) + Perform requests at any time (refresh_token, offline_access)
- Save → Manage Consumer Details → copy the Consumer Key and Consumer Secret
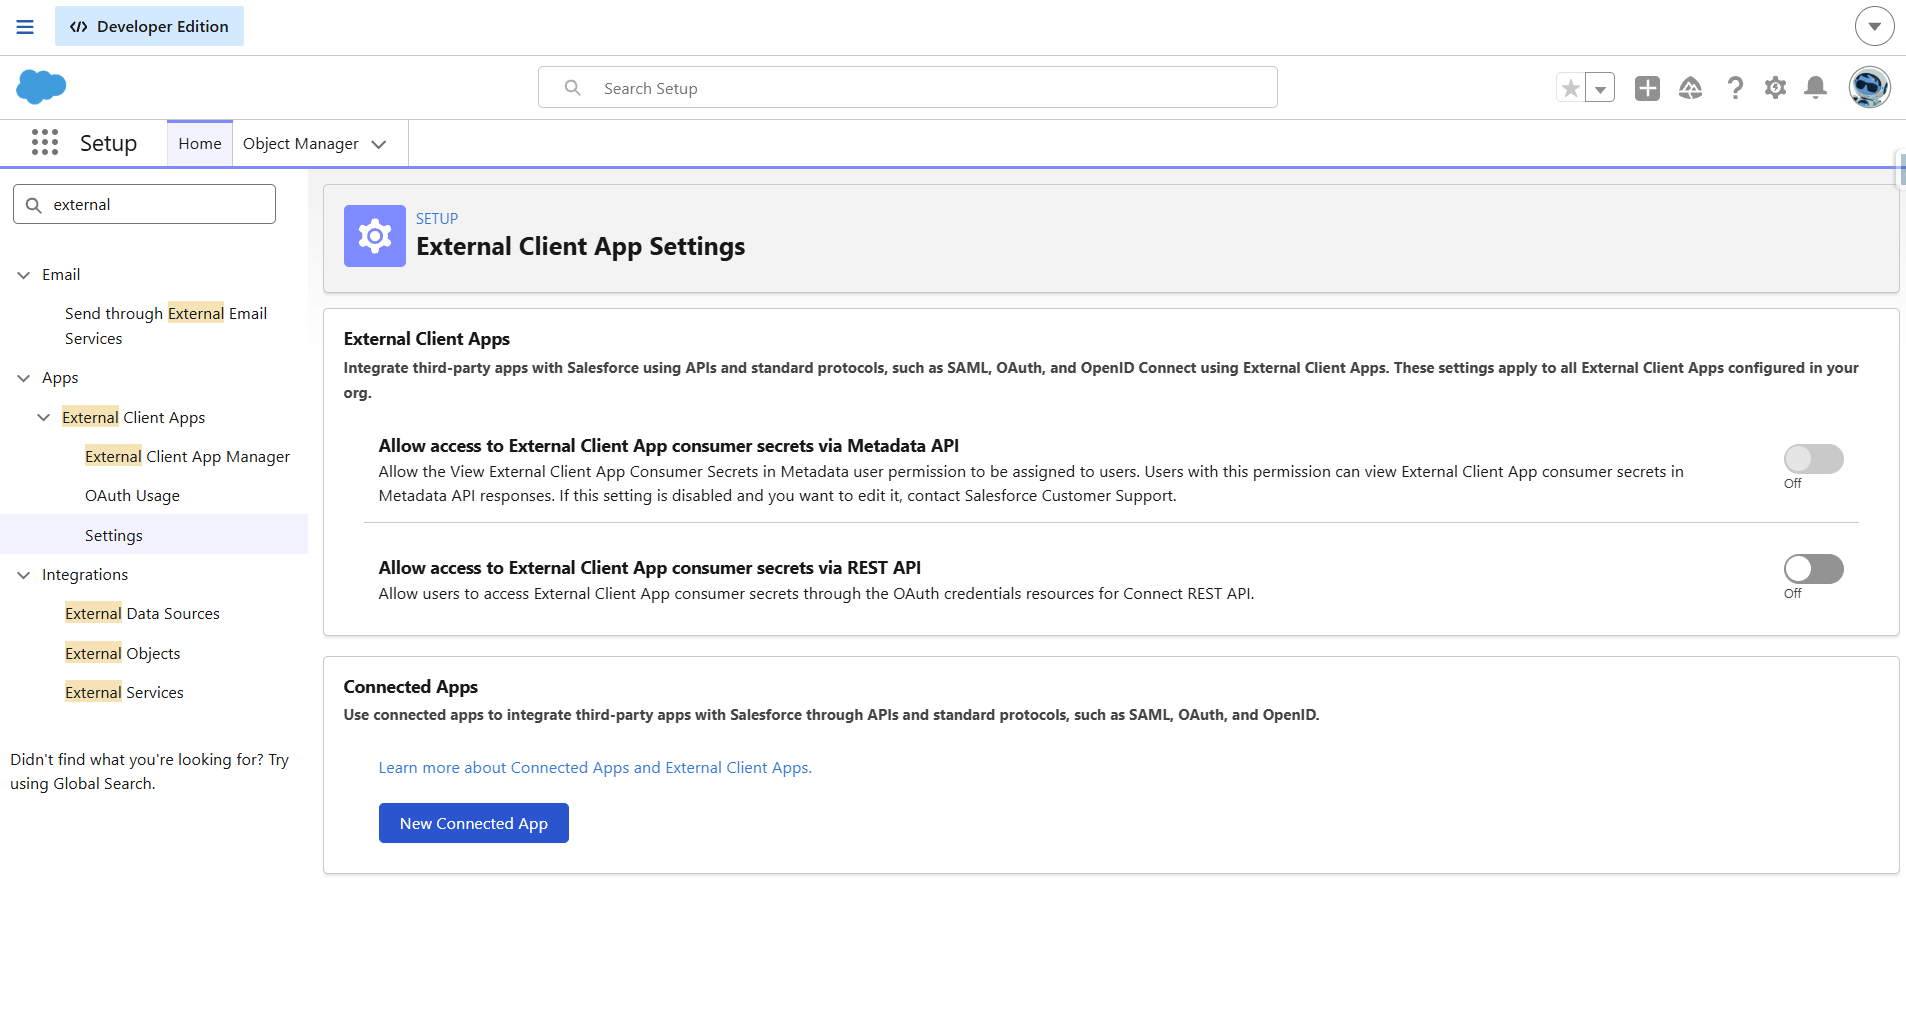
Create a Connected App for the Tooling API
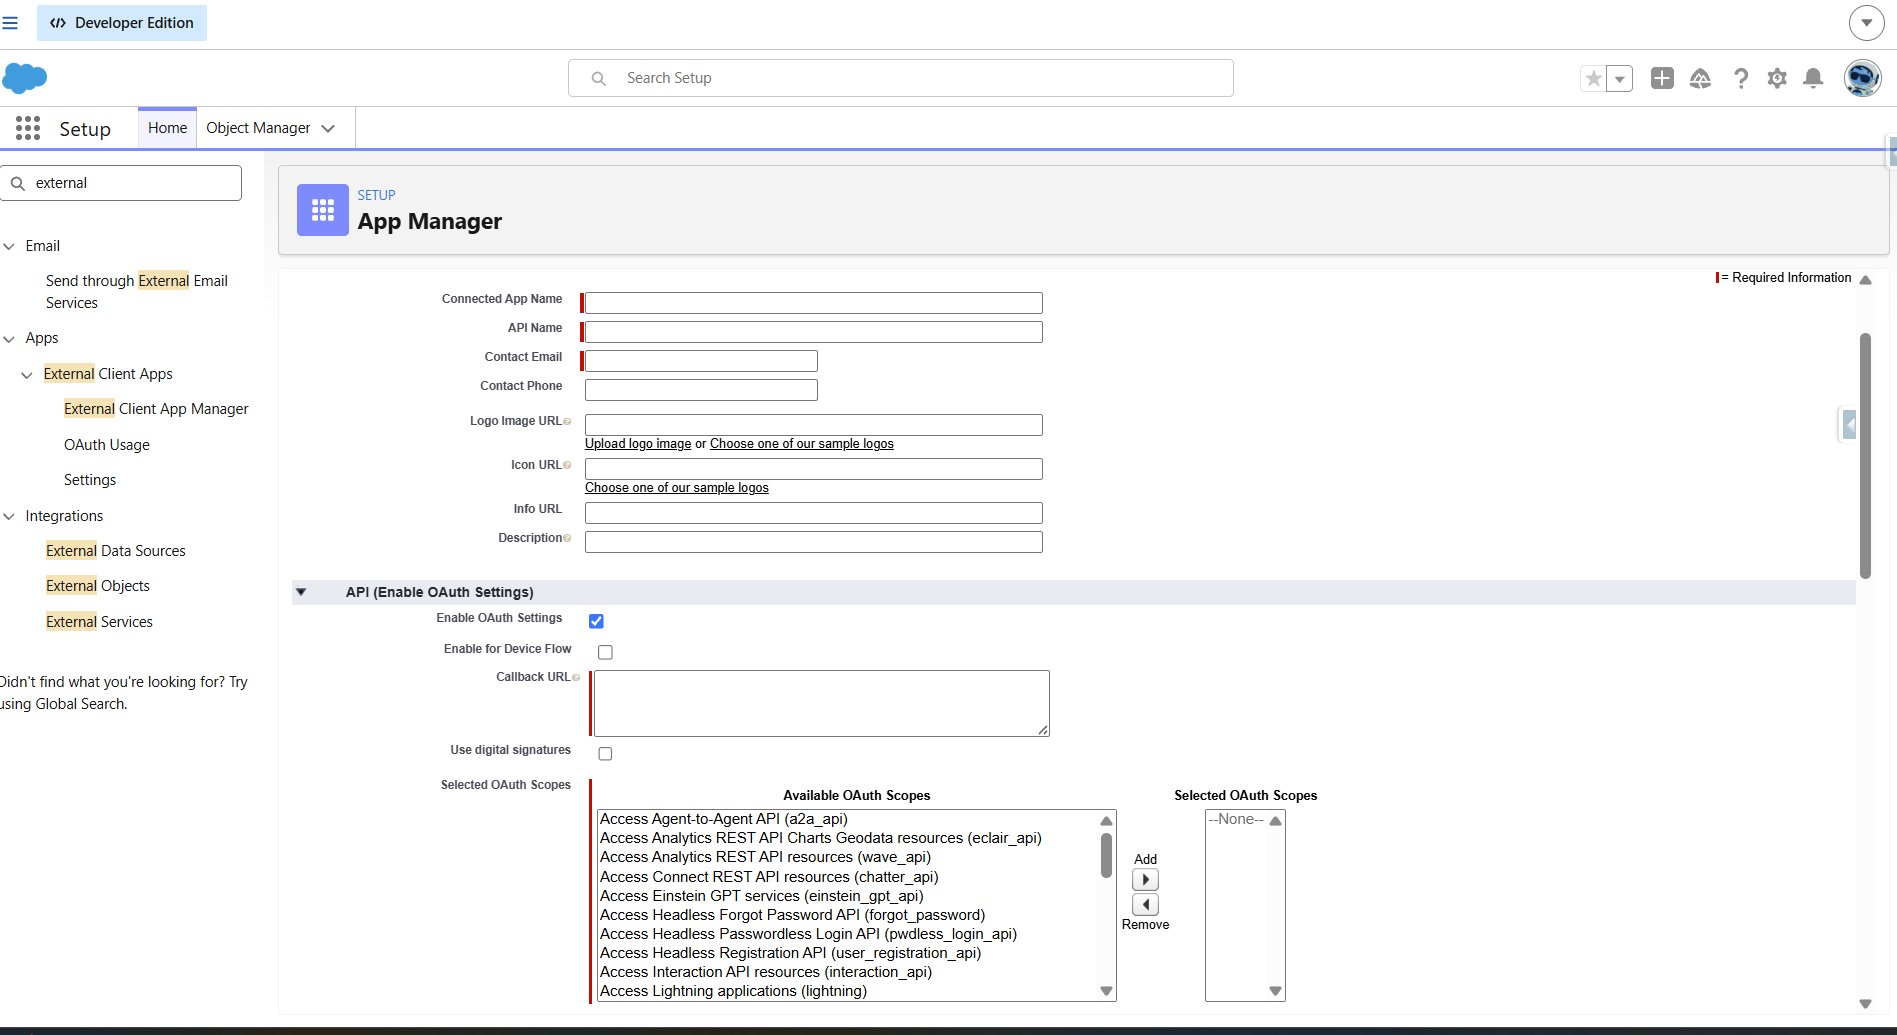
Create a Connected App for the Tooling API
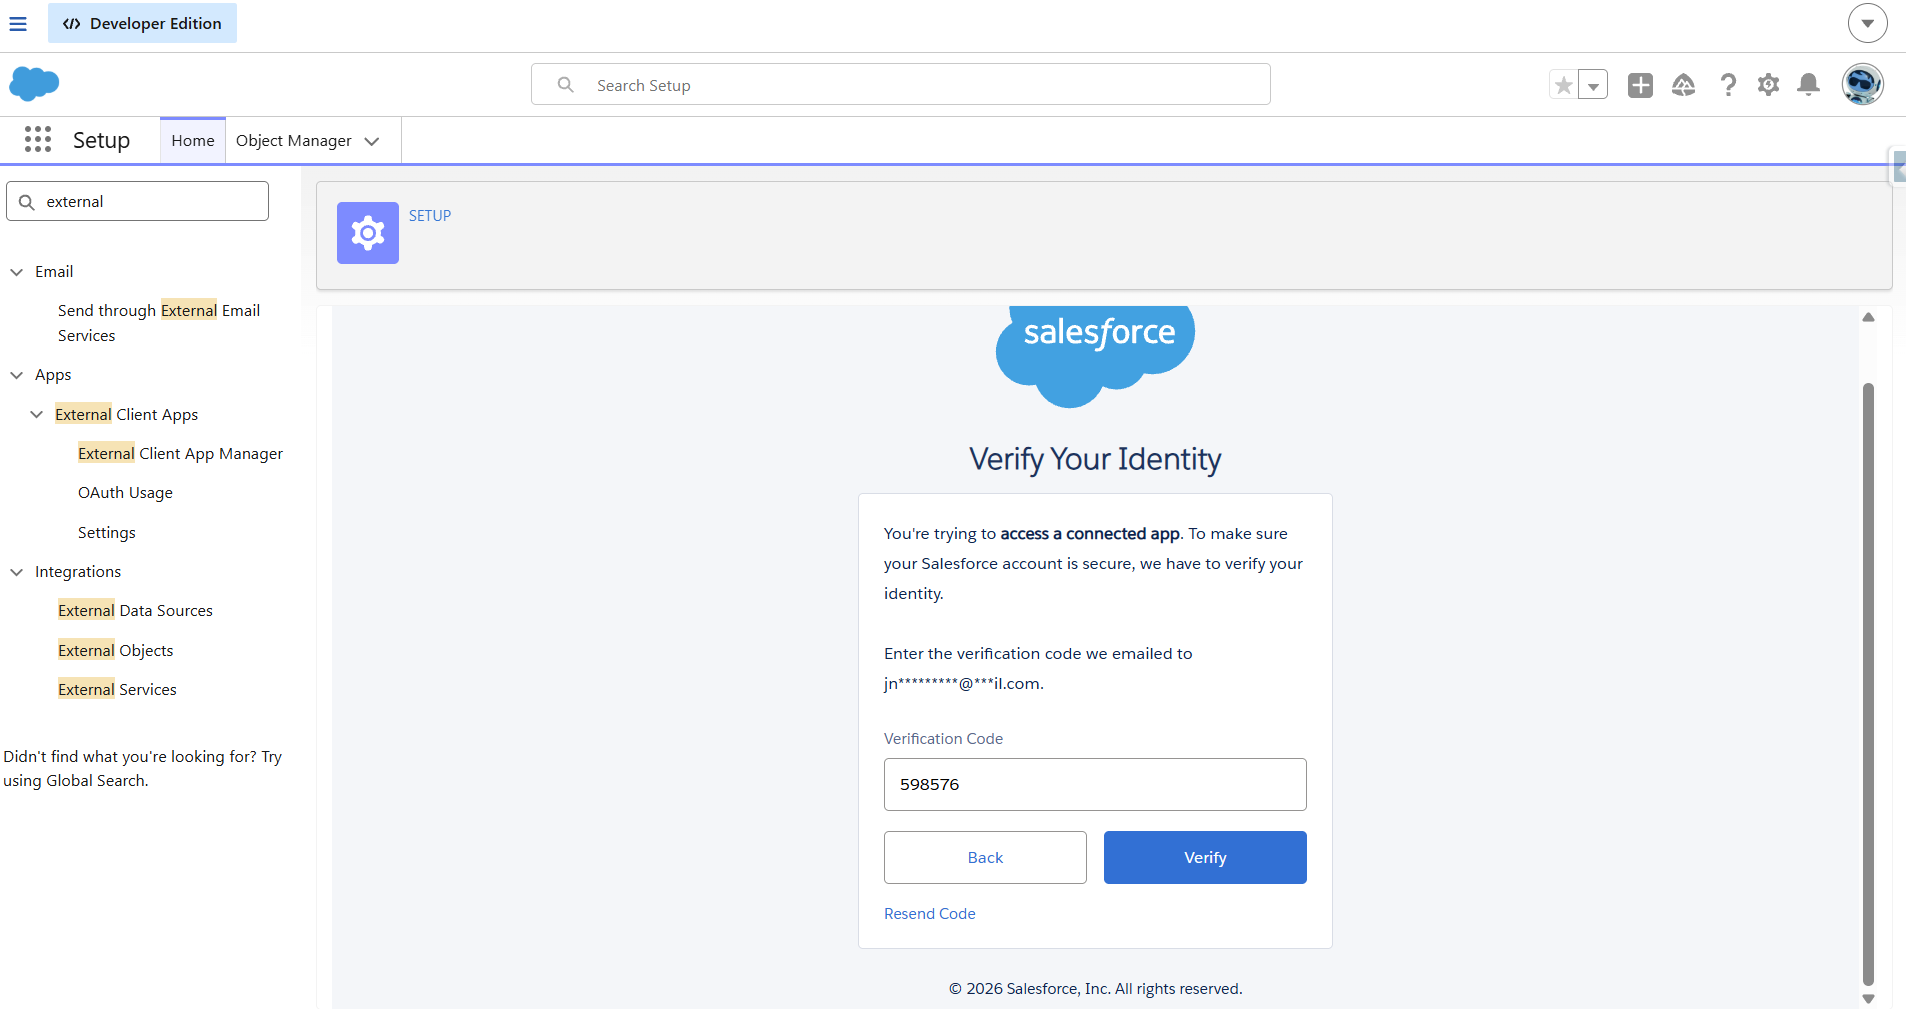
Create a Connected App for the Tooling API
- Name:
UAPA Tooling API Auth· Provider Type: Salesforce - Paste the Consumer Key / Consumer Secret from Step 1
- Default Scopes:
refresh_token full - Save → copy the generated Callback URL — needed for Steps 3 and 4
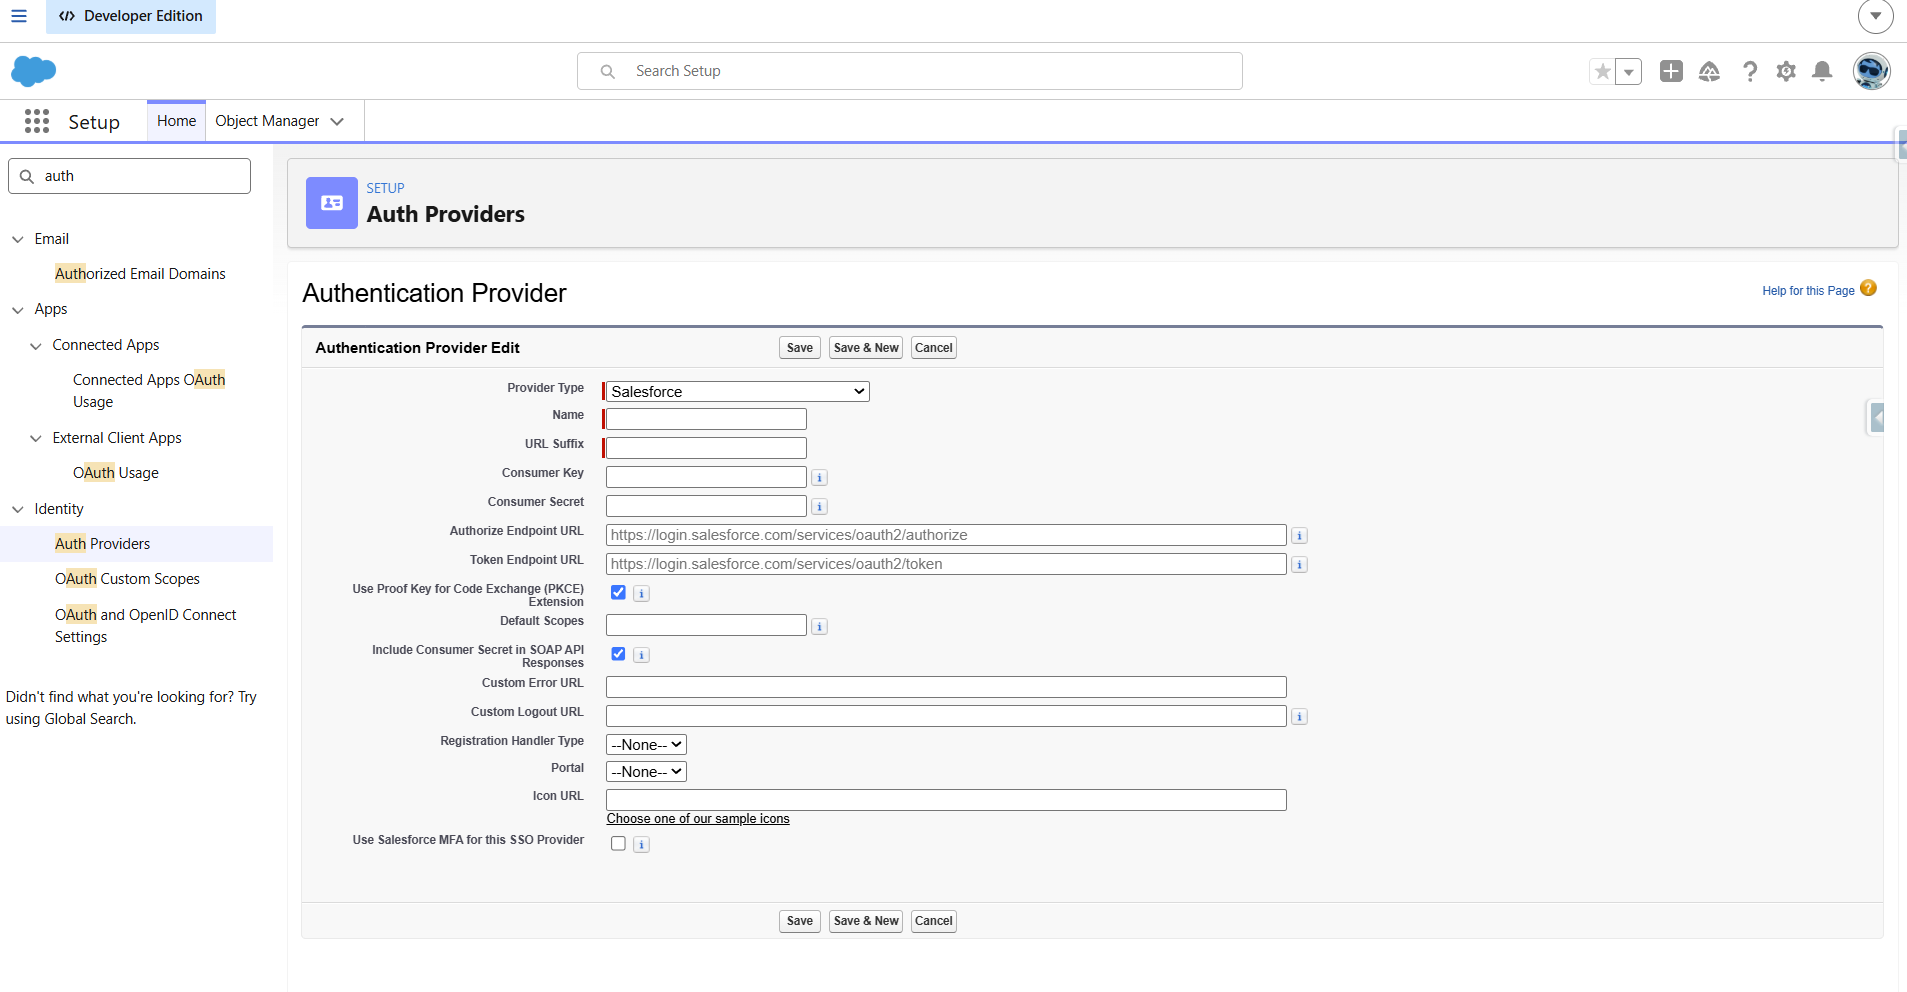
Create an Authentication Provider for the Tooling API
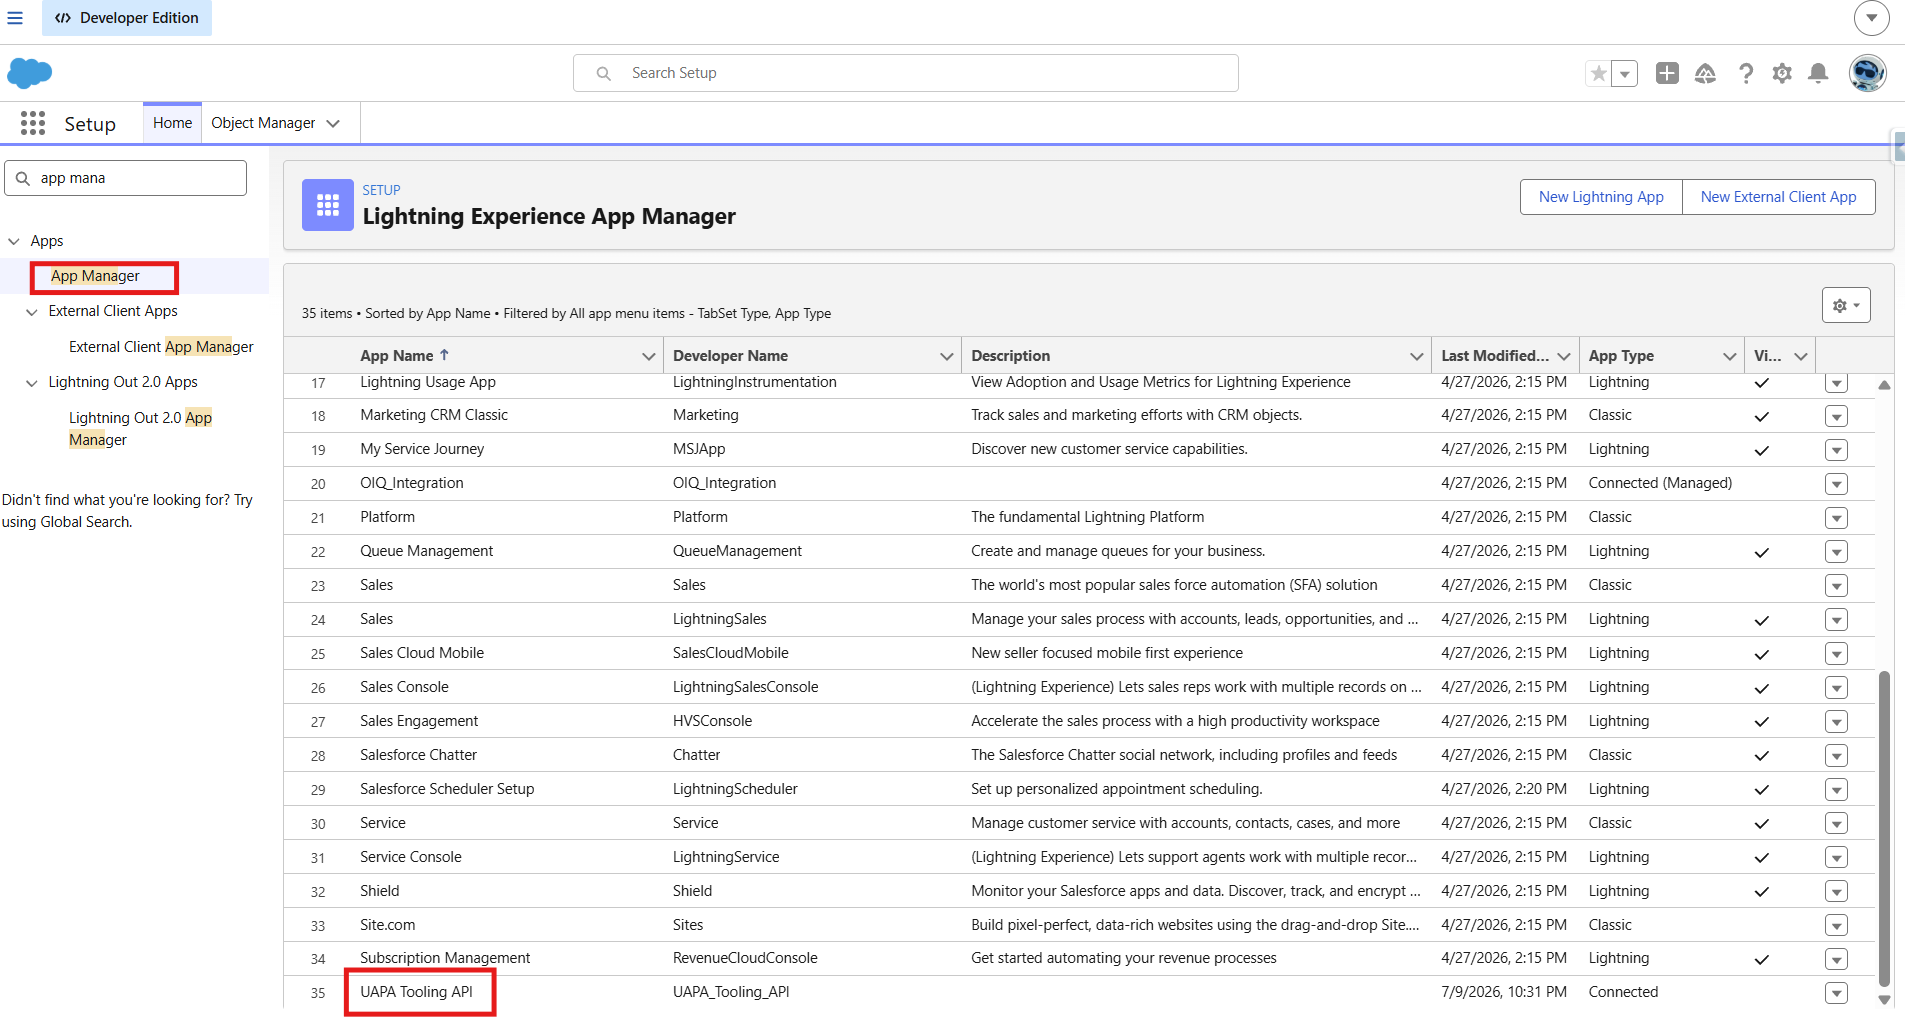
Create an Authentication Provider for the Tooling API
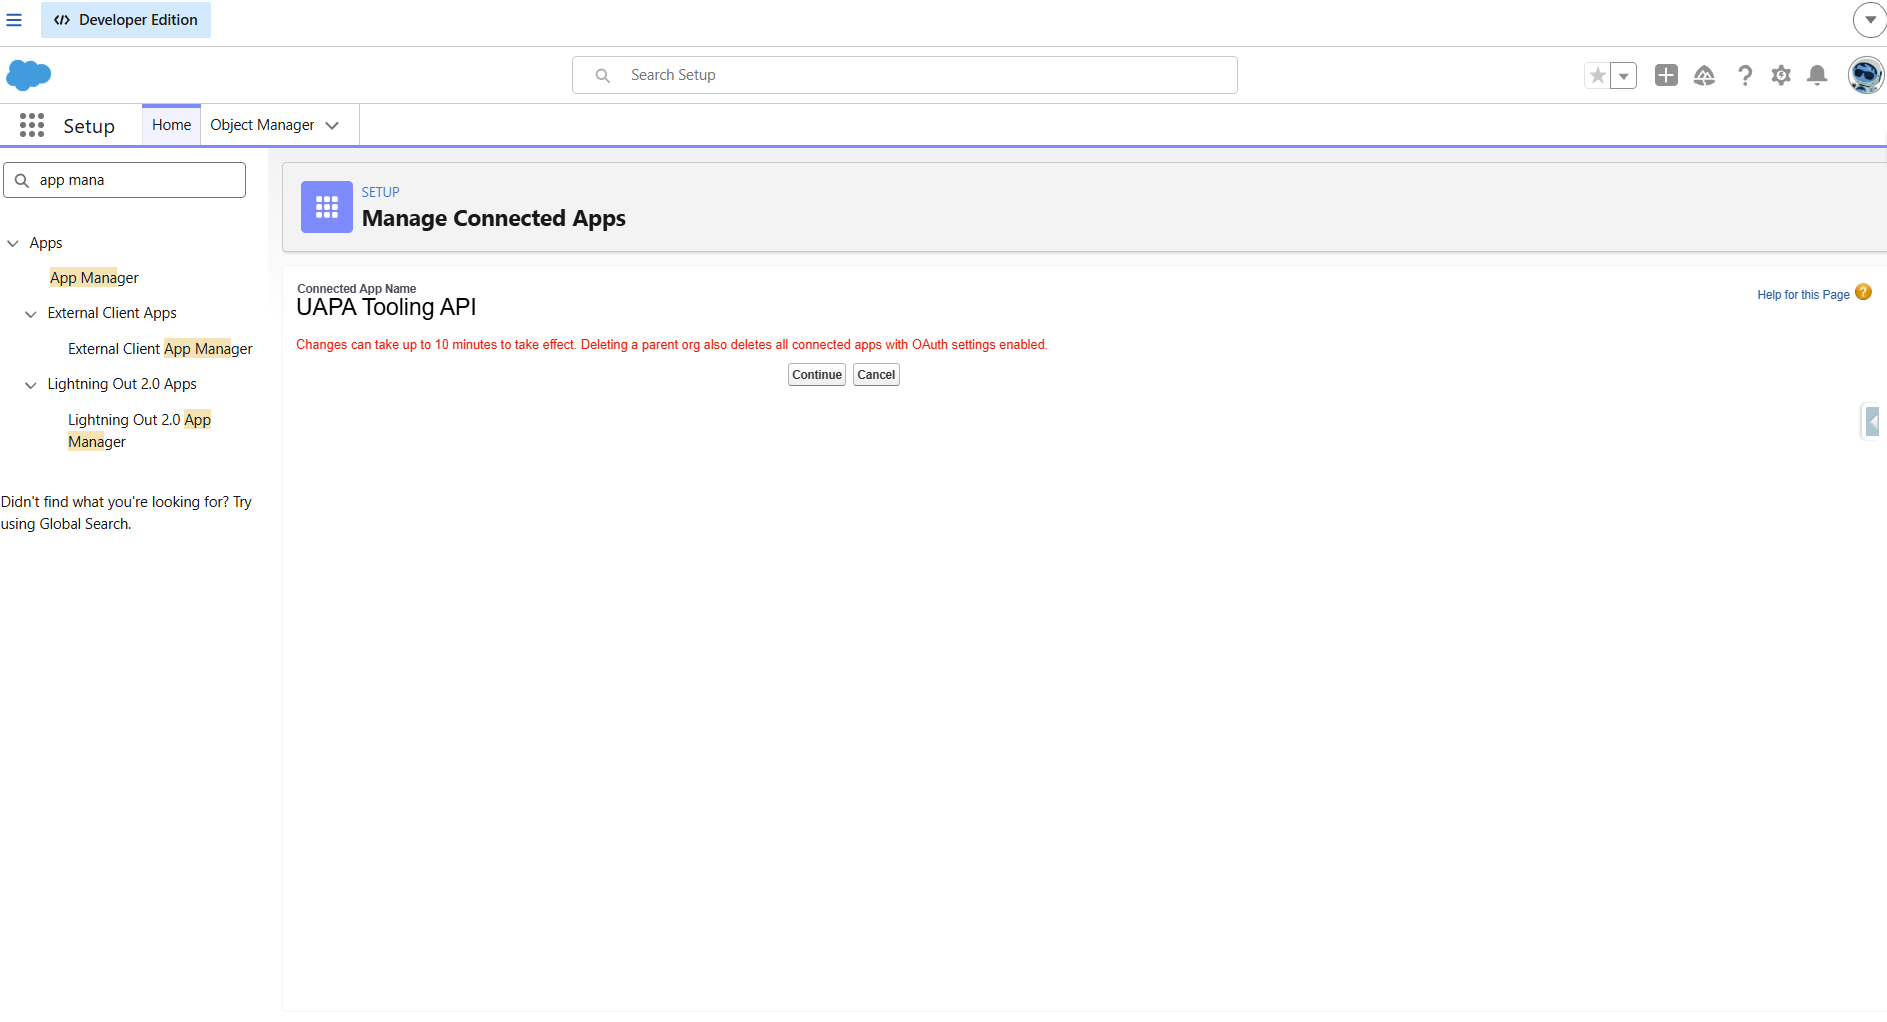
Create an Authentication Provider for the Tooling API
- Label:
Tooling API Credential— Name auto-fills asTooling_API_Credential, required exactly as-is - URL: the domain-only portion of the Step 2 callback URL (e.g.
https://yourdomain.my.salesforce.com) - Identity Type: Per User · Authentication Protocol: OAuth 2.0
- Authentication Provider: the one from Step 2 · Scope:
refresh_token full - Callout Options: check Generate Authorization Header and Allow Merge Fields in HTTP Body only
- Save → log in → click Allow → confirm Authentication Status shows "Authenticated as [you]"
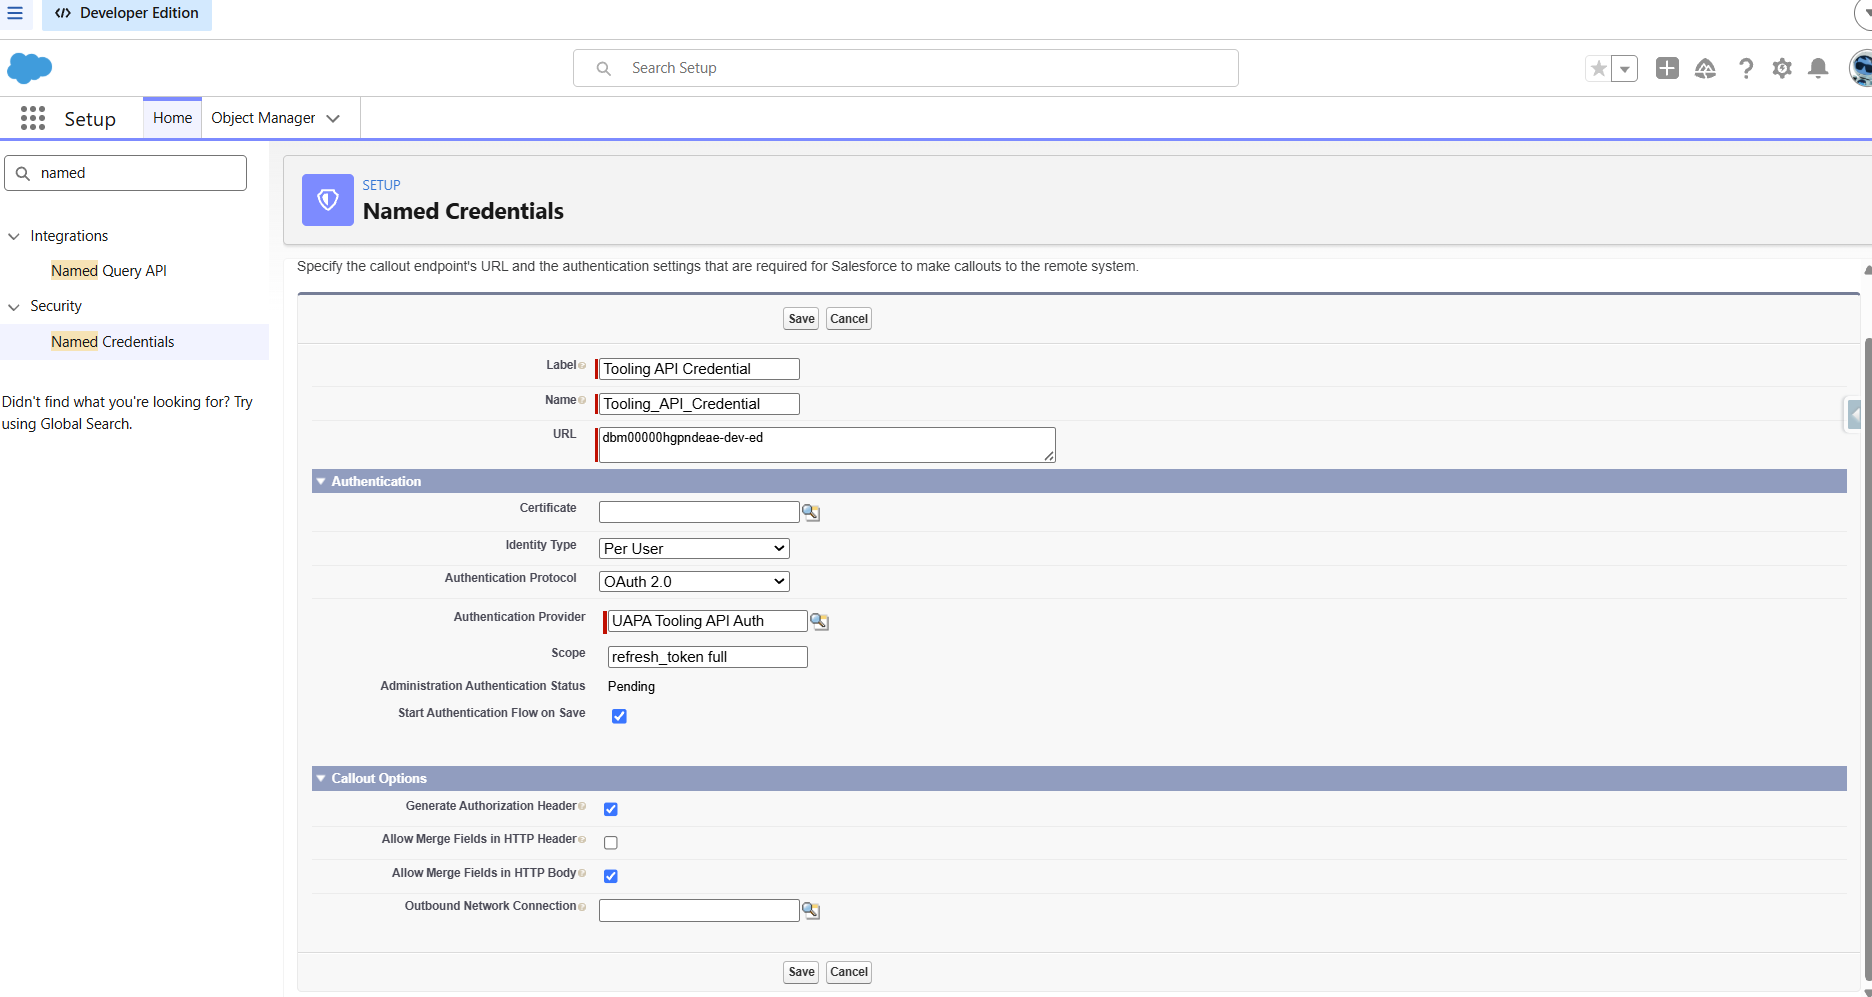
Create a Named Credential for the Tooling API
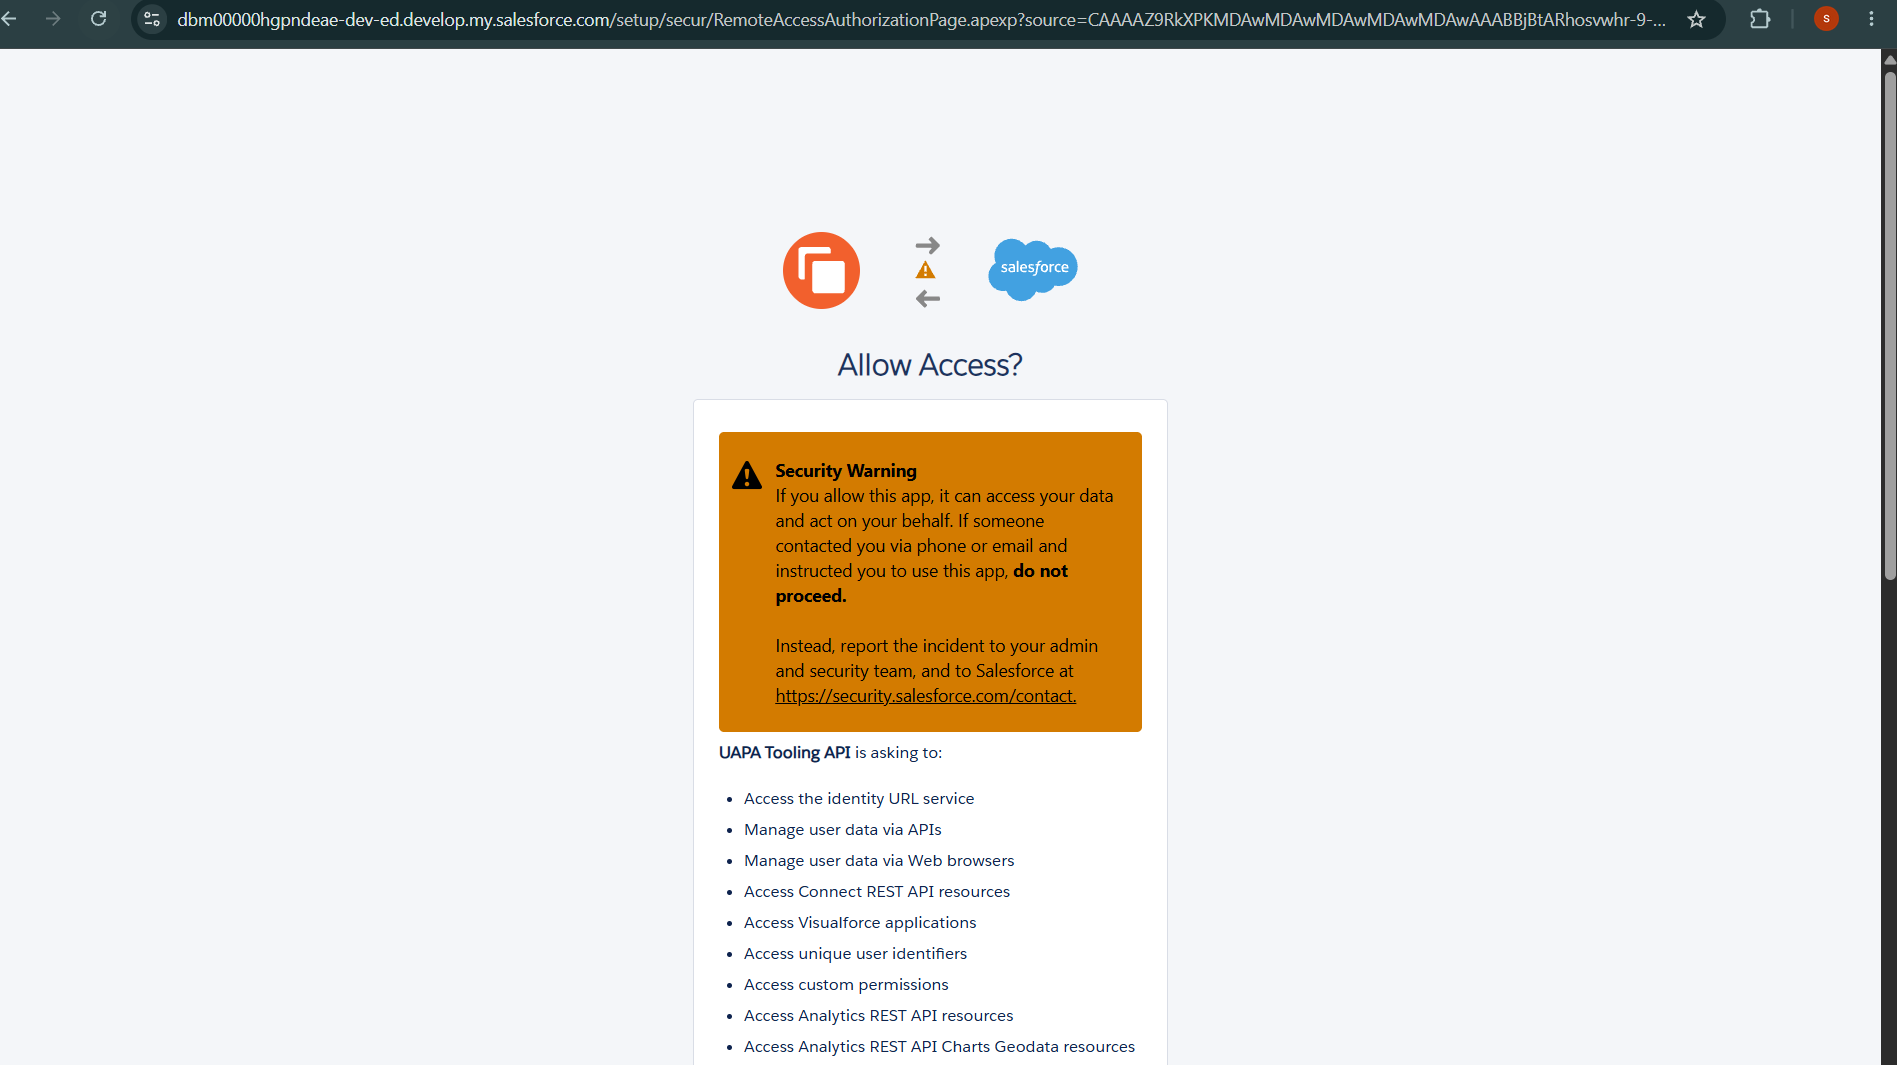
Create a Named Credential for the Tooling API
UAPA Tooling API Access → Save.
- Open it → Named Credential Access → Edit → enable
Tooling_API_Credential→ Save - Same Permission Set → Assigned Connected Apps → Edit → enable the Connected App from Step 1 → Save
- Assign this Permission Set to yourself
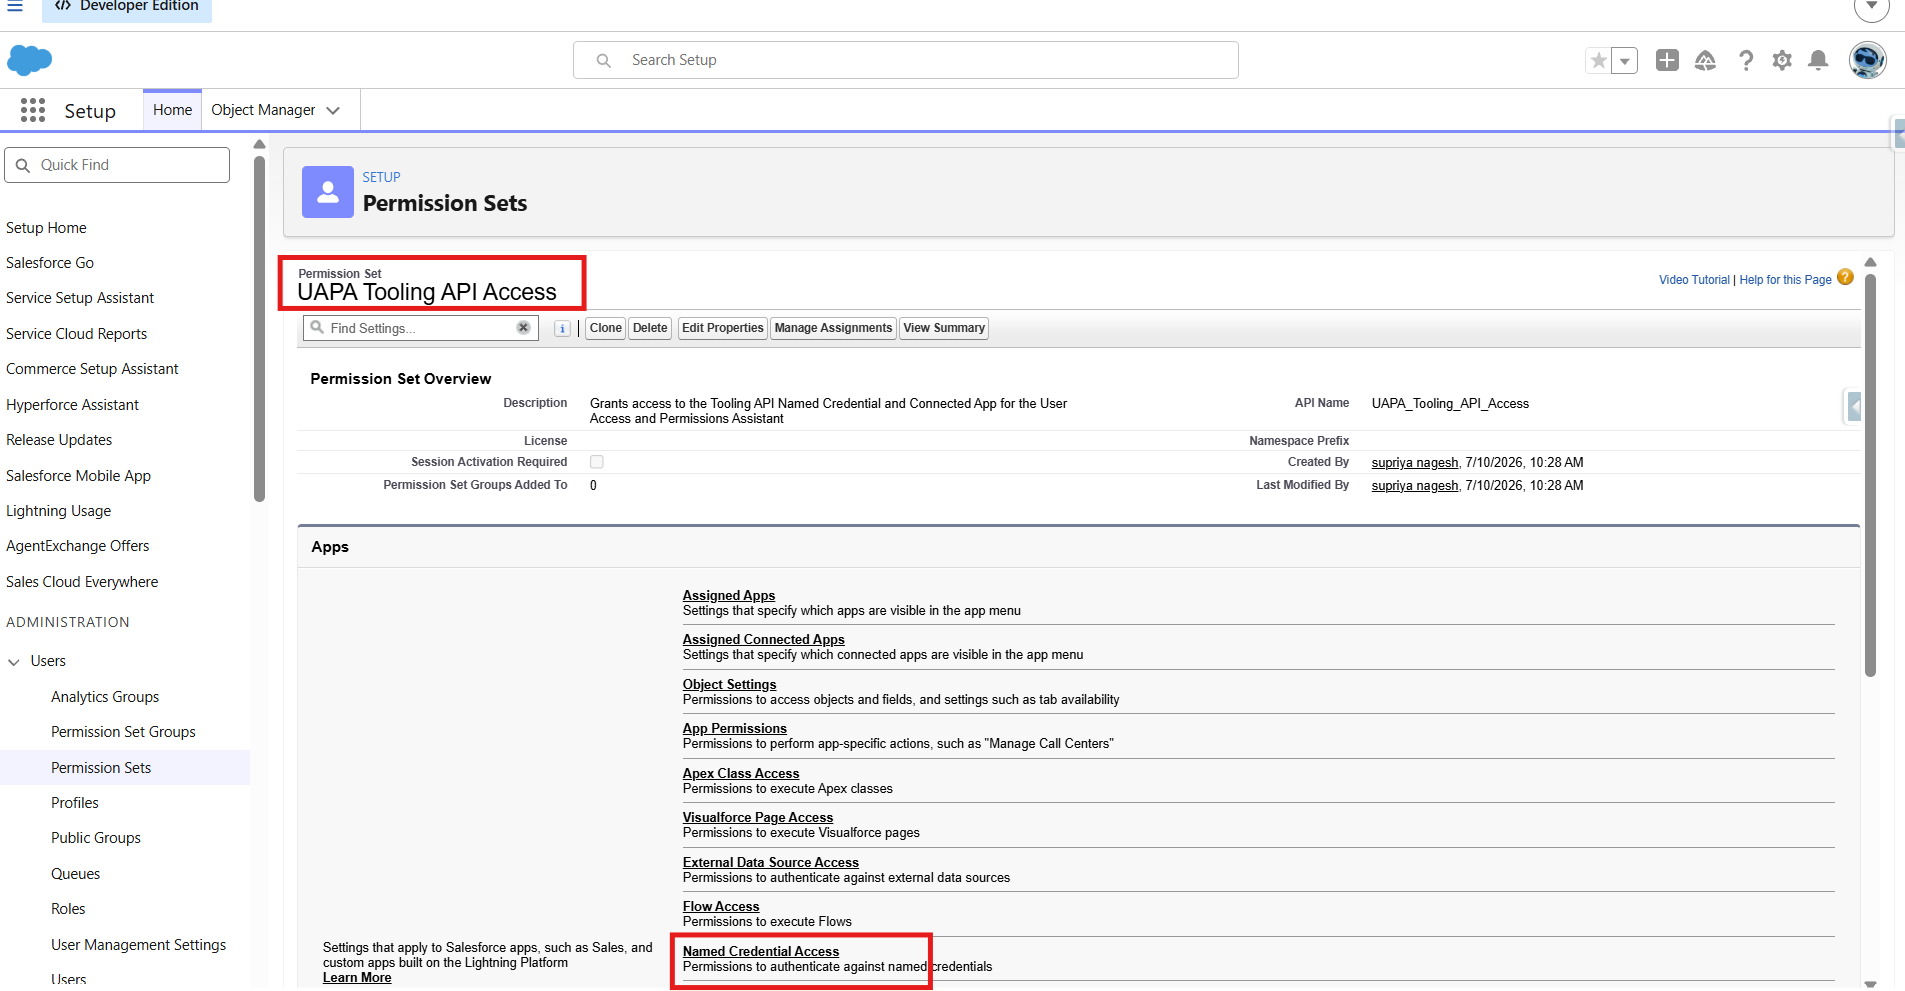
Create a Permission Set to use the Named Credential
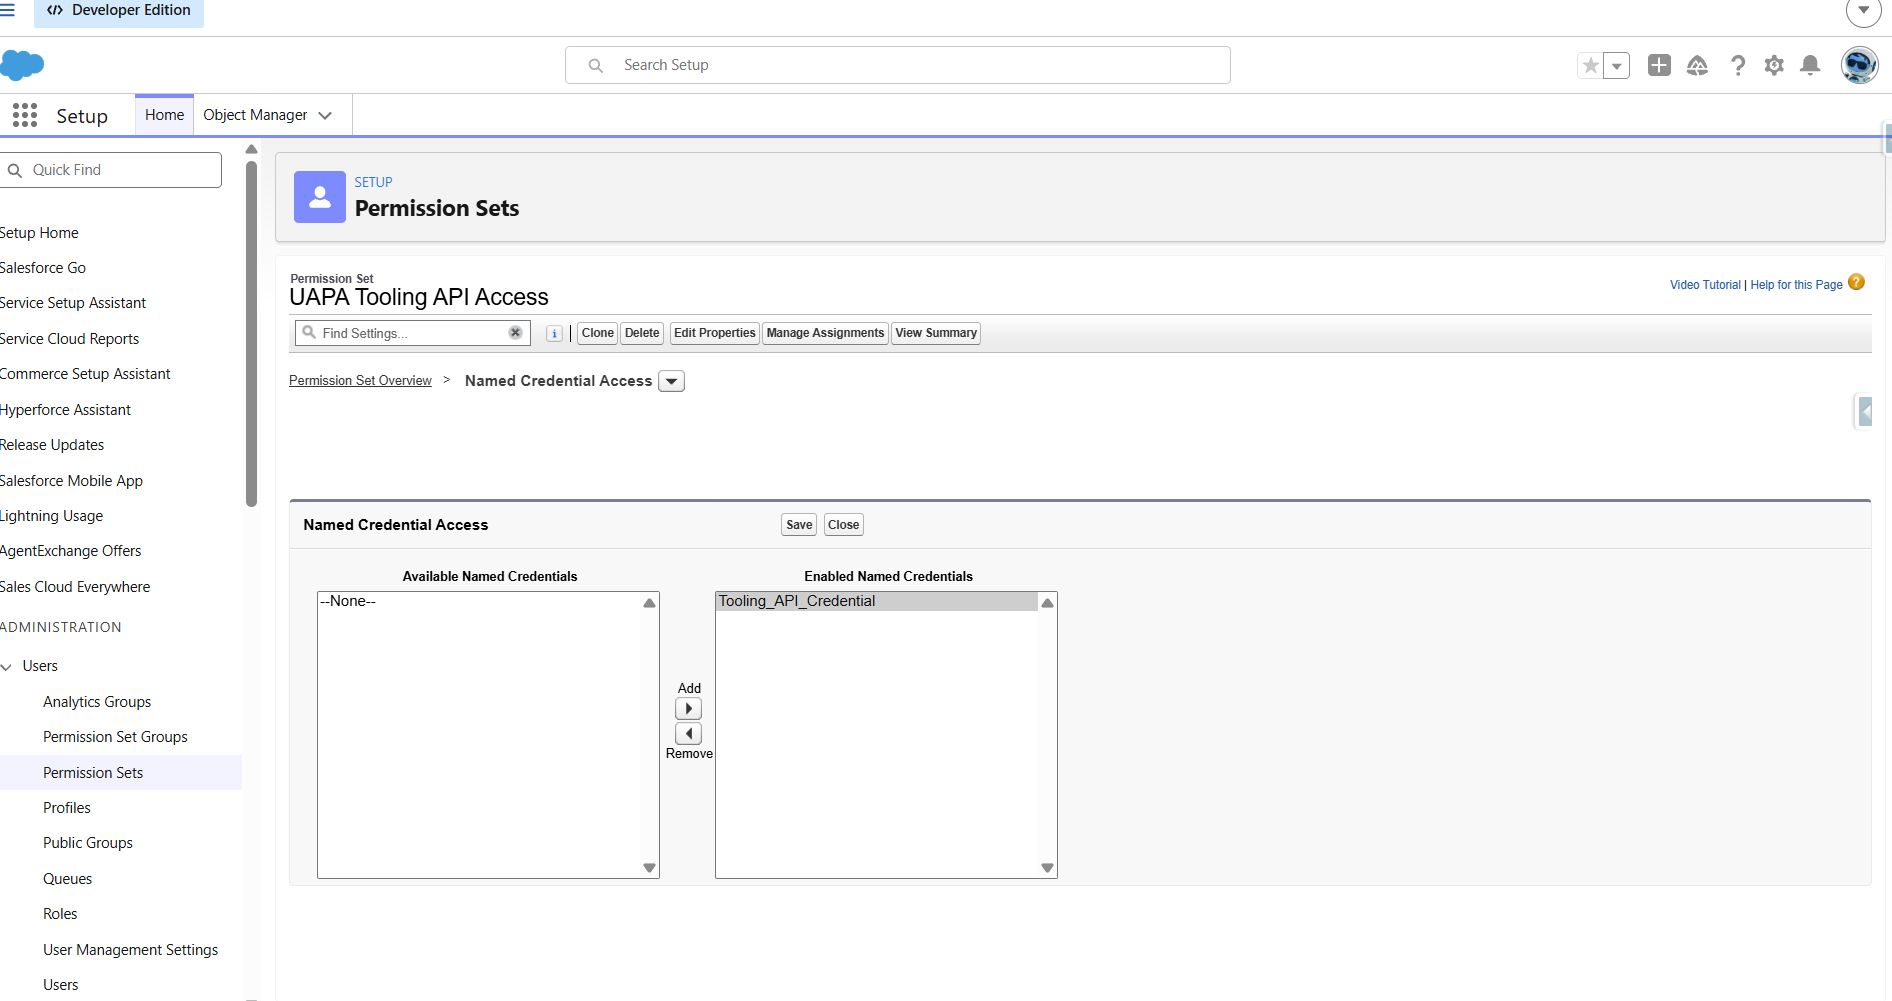
Create a Permission Set to use the Named Credential
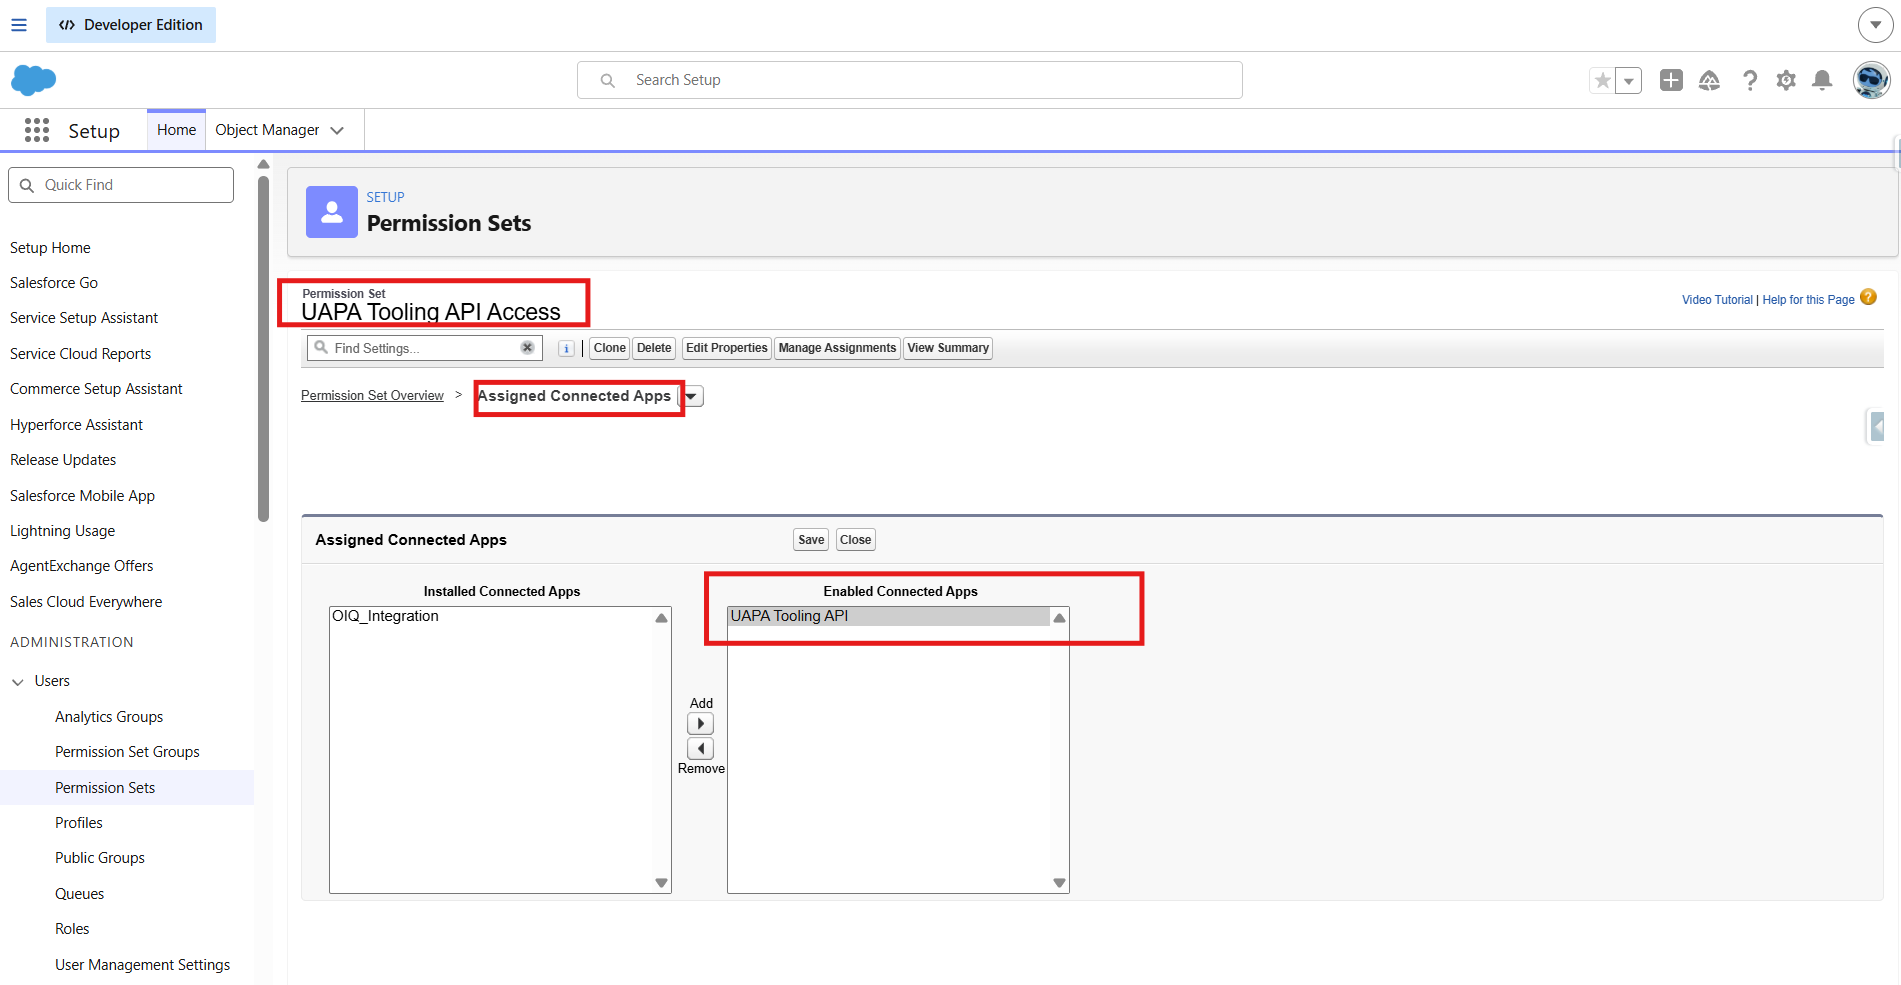
Create a Permission Set to use the Named Credential
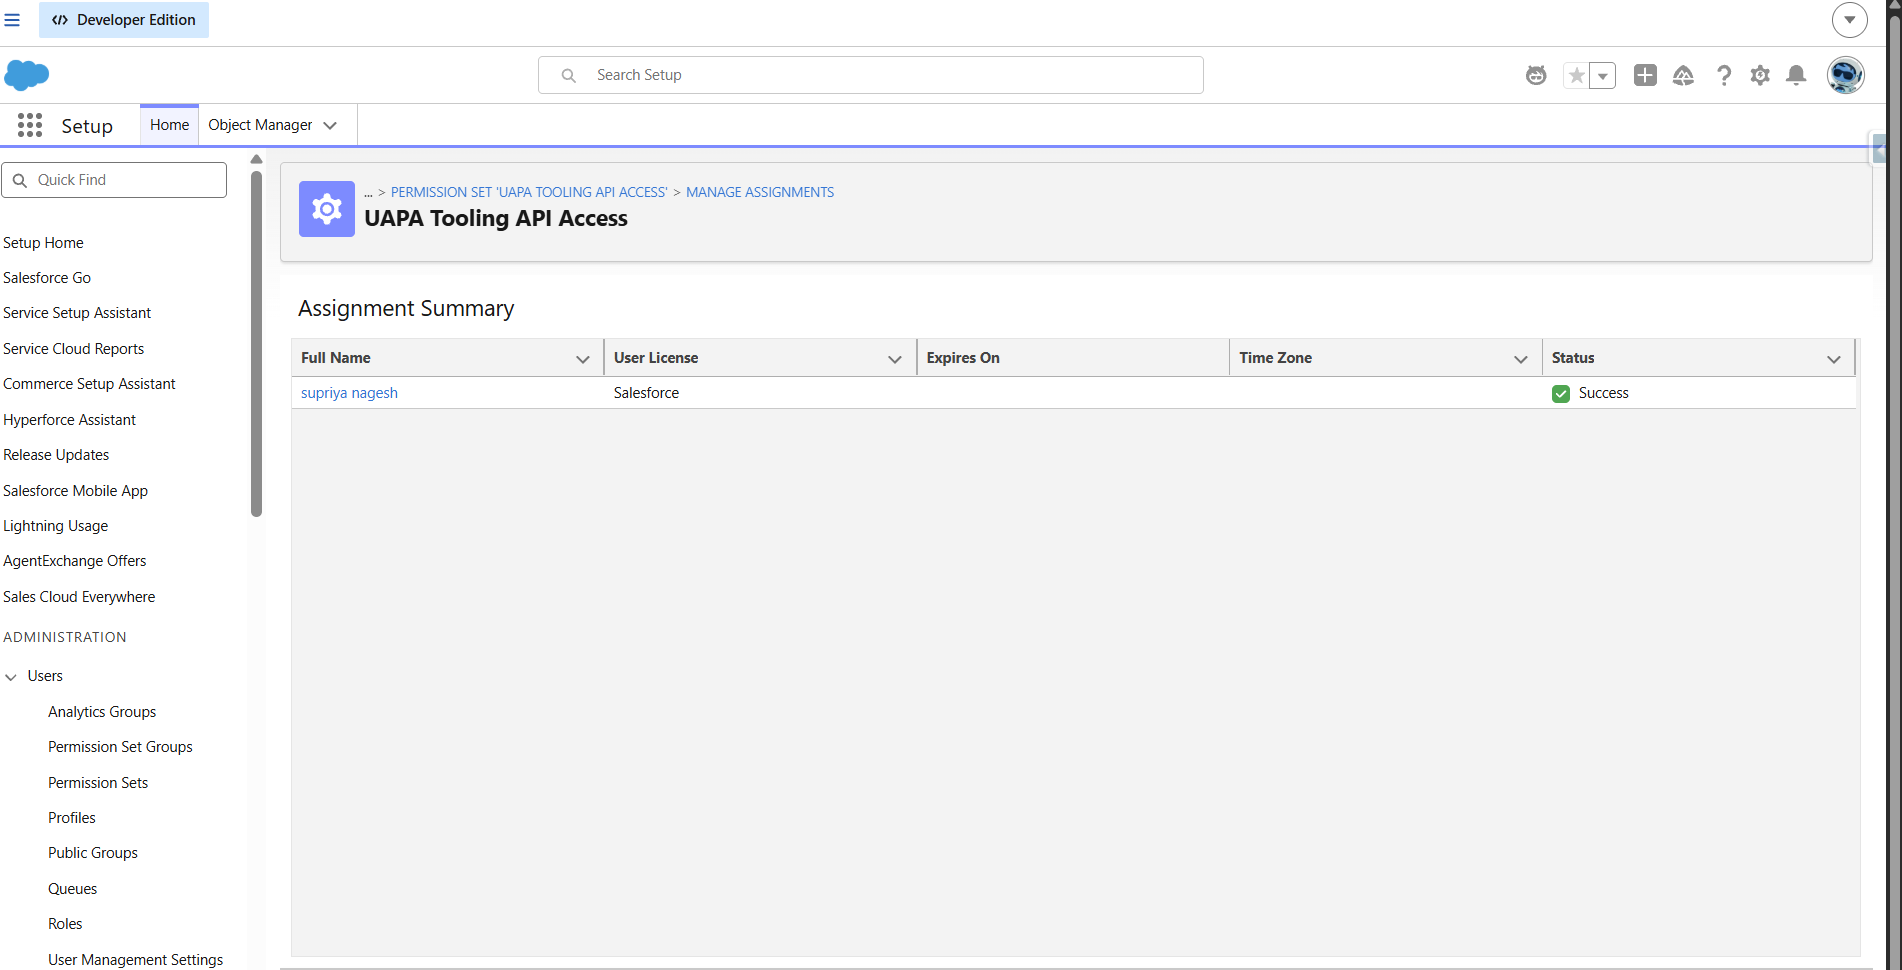
Create a Permission Set to use the Named Credential
💡 On the deprecation notice
Salesforce's Spring '26 release restricts new Connected App creation in favour of External Client Apps. This flow — via External Client Apps → Settings → New Connected App — is still Salesforce's own documented path for this specific tool, so proceed as instructed even if you see the deprecation notice.
The part that stops most people
The Error You'll Probably Hit: redirect_uri_mismatch
If Step 4's login/Allow flow throws this:
error=redirect_uri_mismatch&error_description=redirect_uri must match configurationdon't assume you've mistyped something. In practice, this is most often a propagation delay, not a mismatched value.
⚠️ What's actually happening
Connected App Callback URL changes (Step 3) can take roughly 10 minutes to fully apply across Salesforce's auth infrastructure. If you complete Step 3 and immediately move to Step 4's authentication flow, the Named Credential is still trying to authenticate against the old callback configuration — which throws this exact error, even though the values you entered are entirely correct.
How to resolve it:
💡 The genuinely useful part of this whole article
This is worth knowing before you hit it — the error message itself gives no indication that "wait" is the actual fix, and it's easy to assume you've broken a configuration value when really you just need patience.
Now the actual install
Installing the App
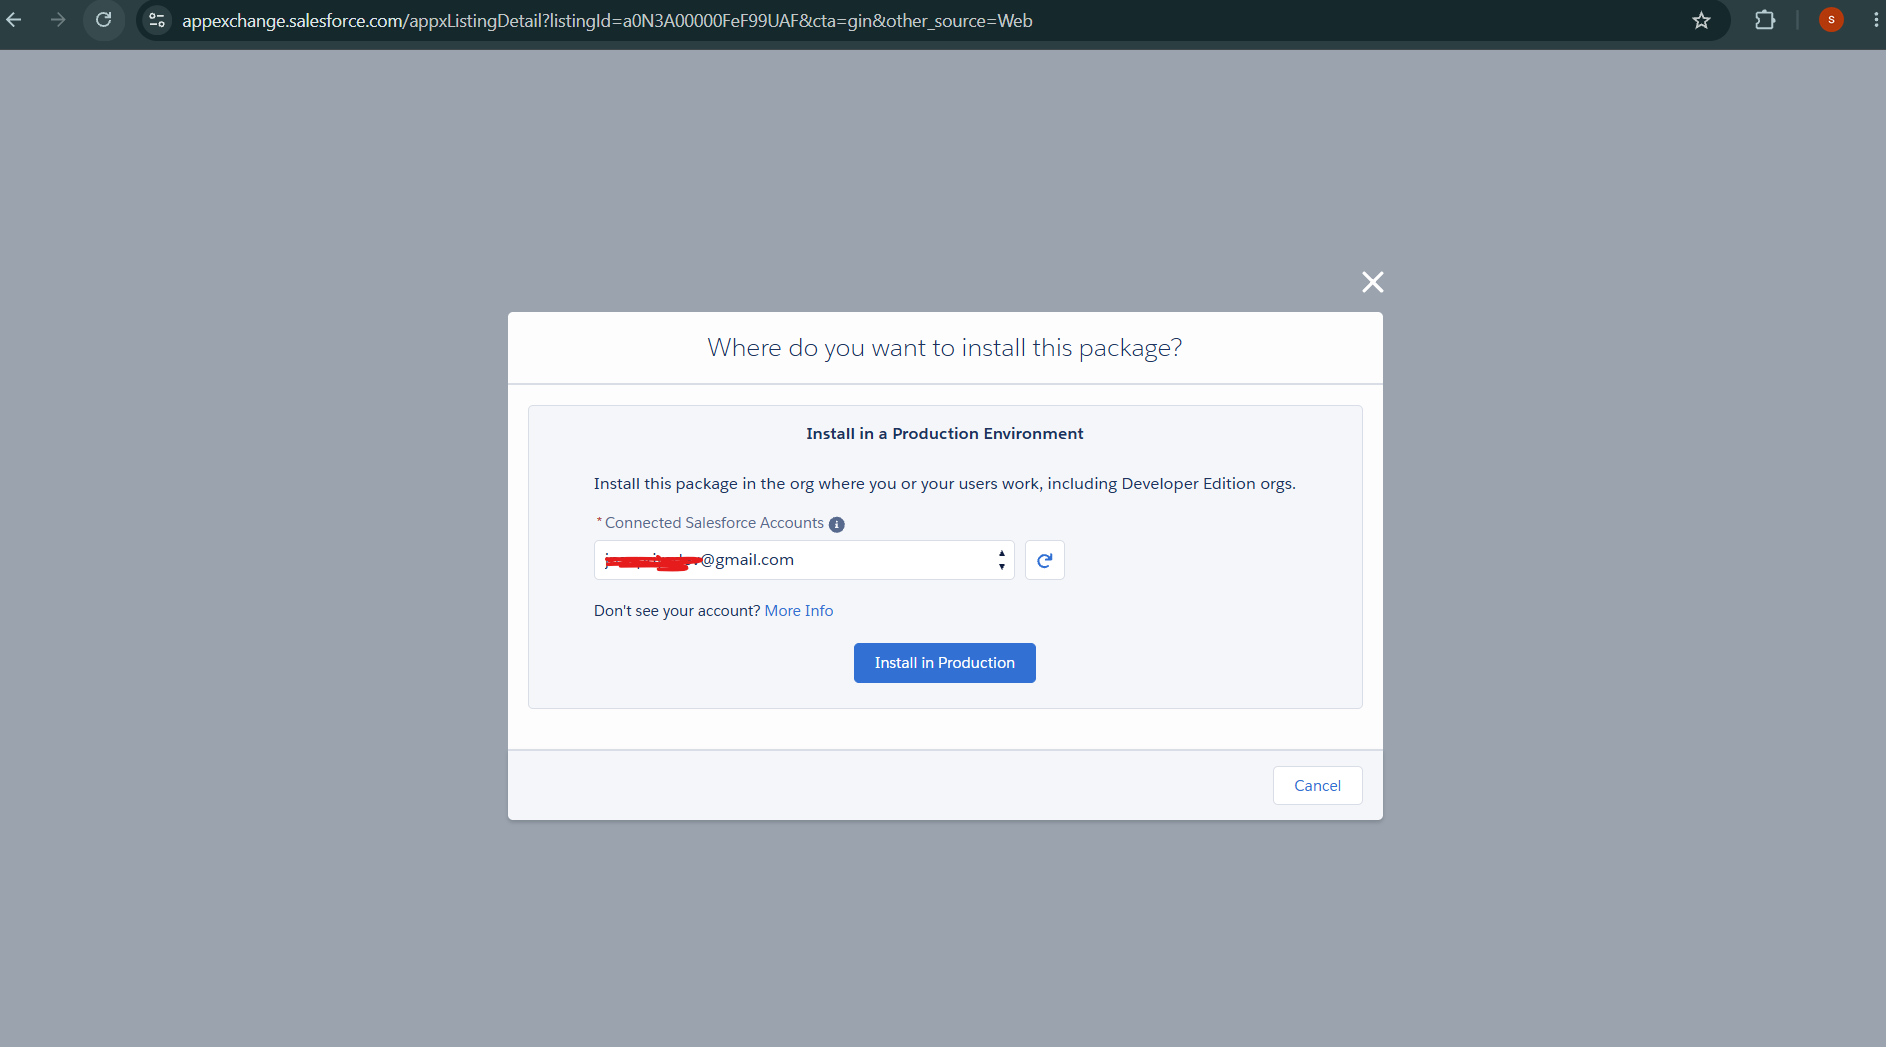
Download the package from AppExchange
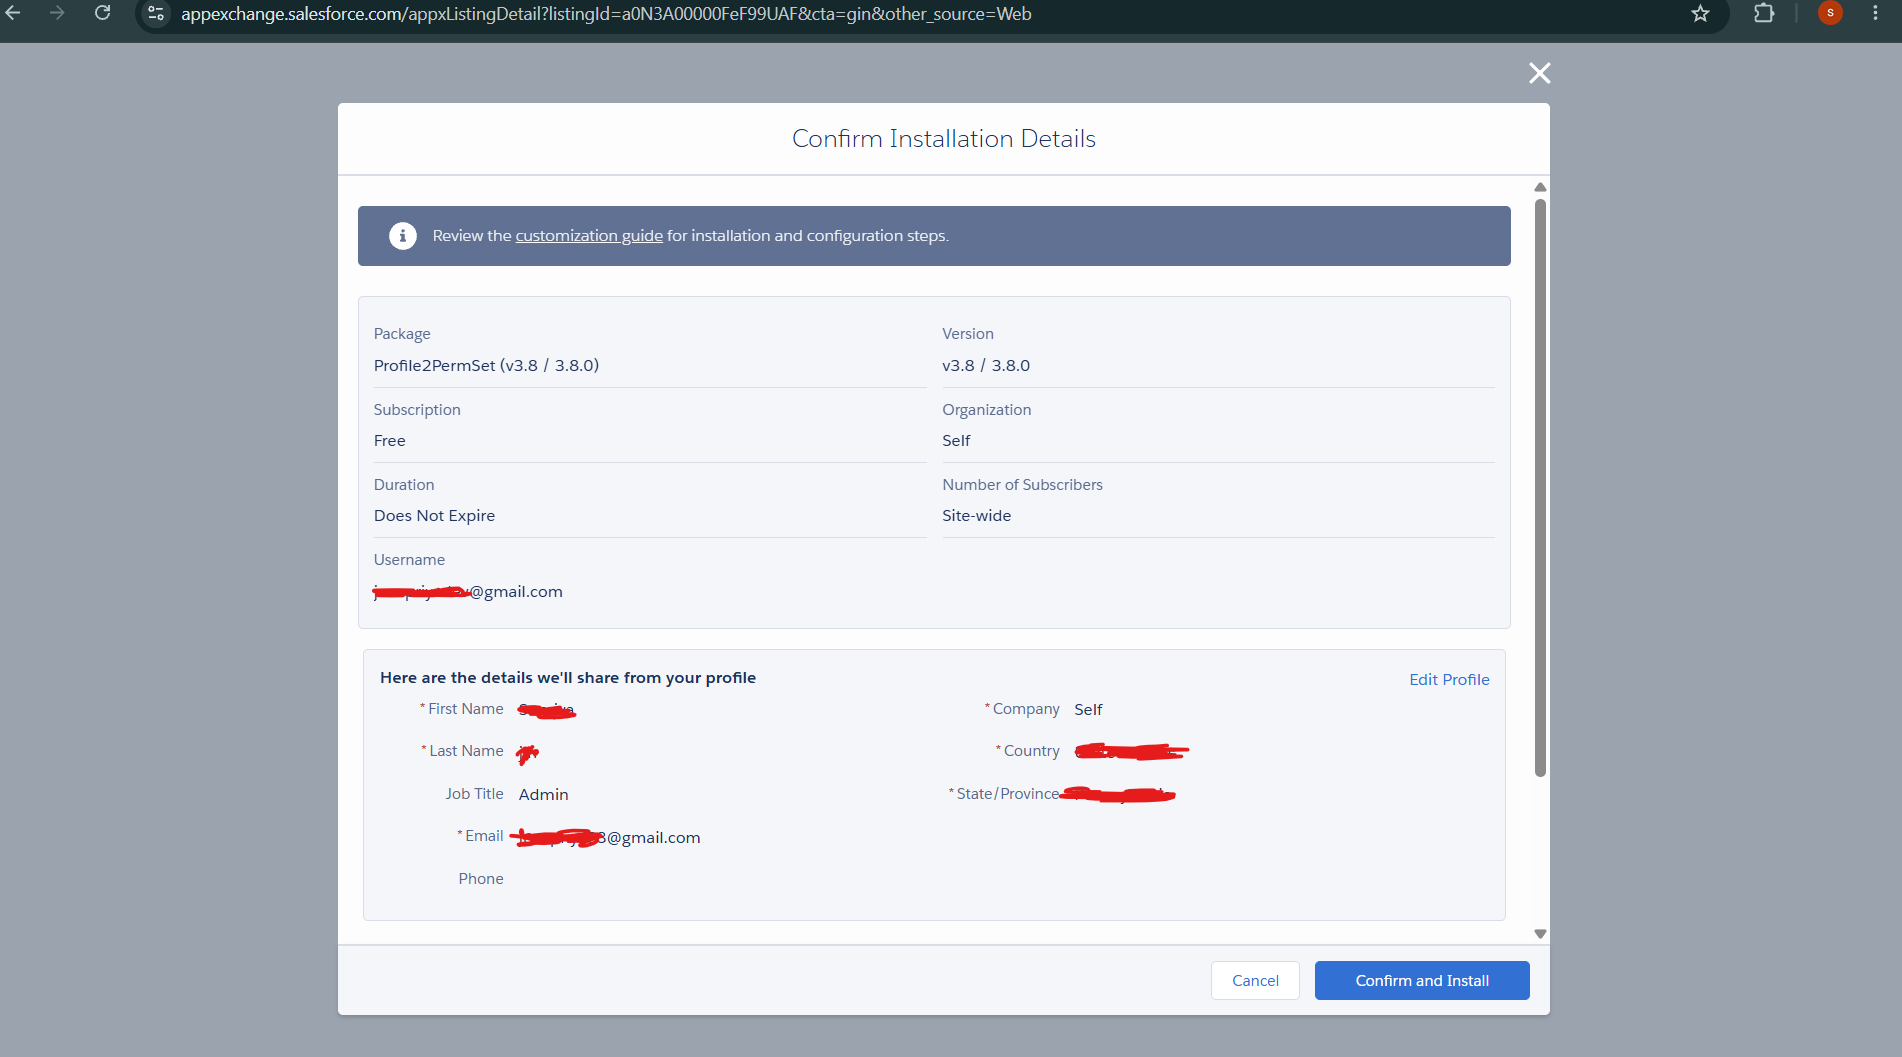
Download the package from AppExchange
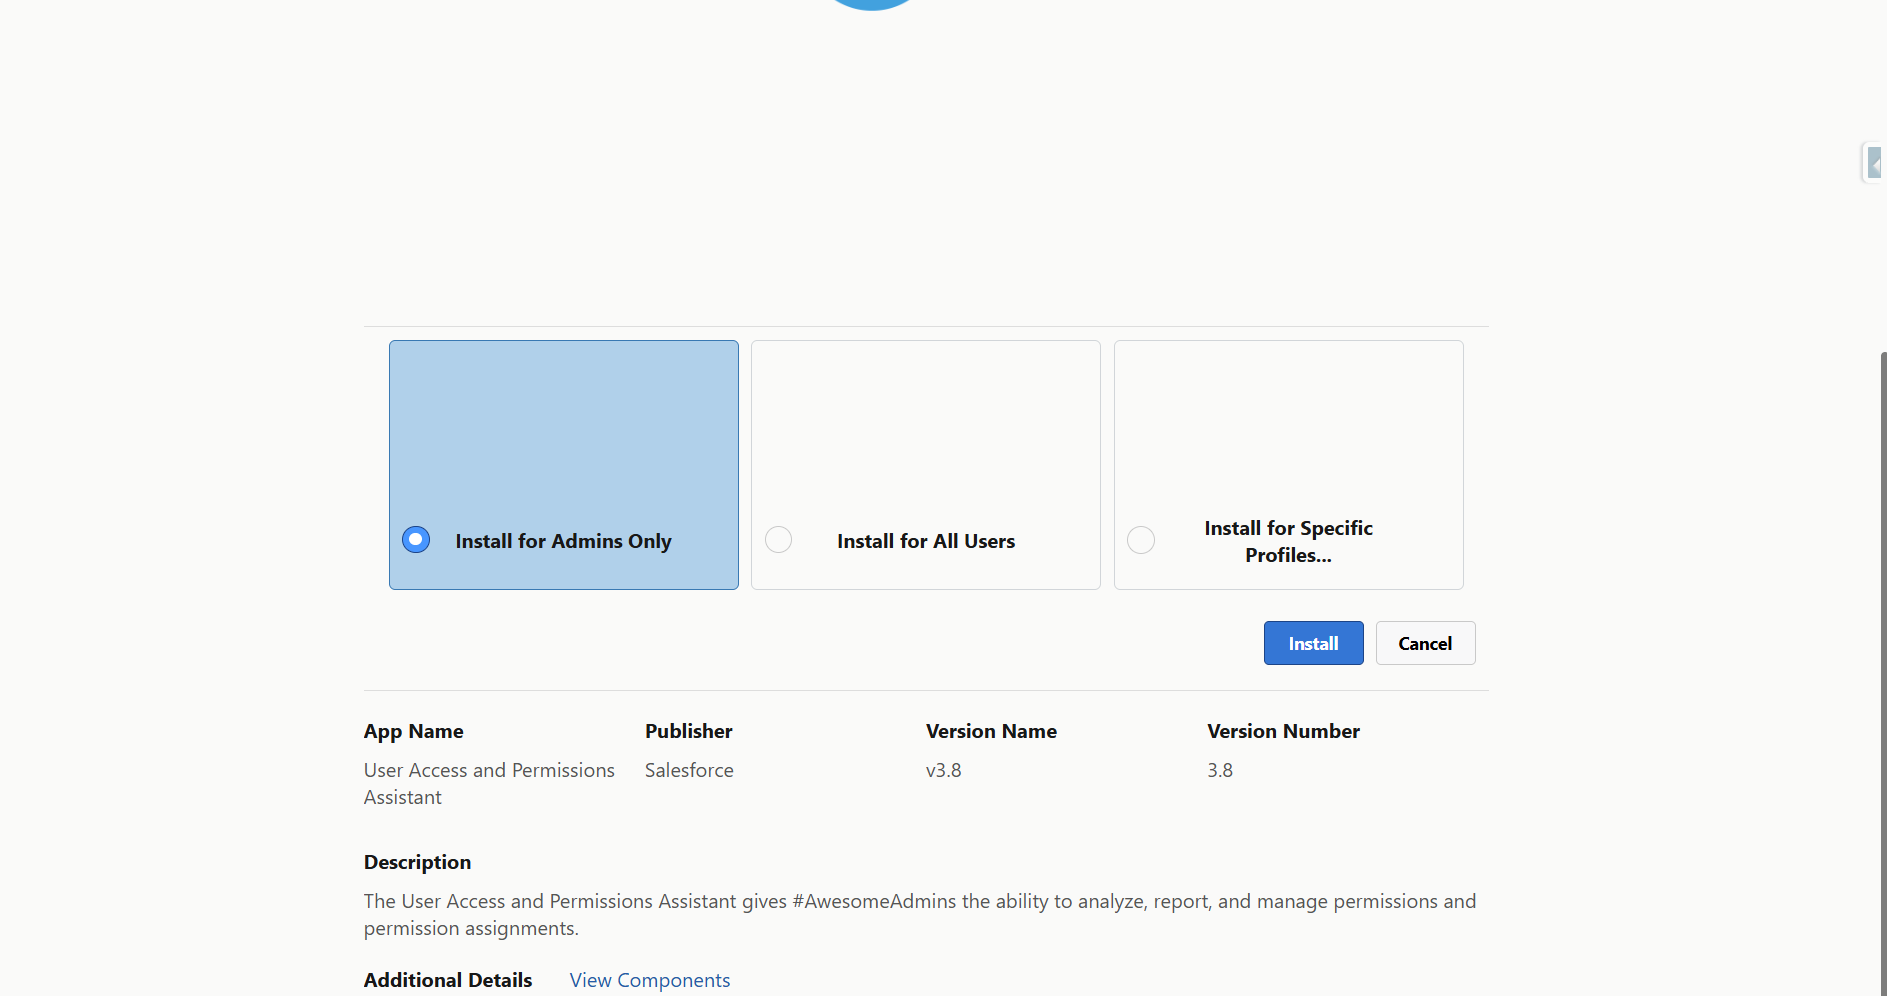
Download the package from AppExchange
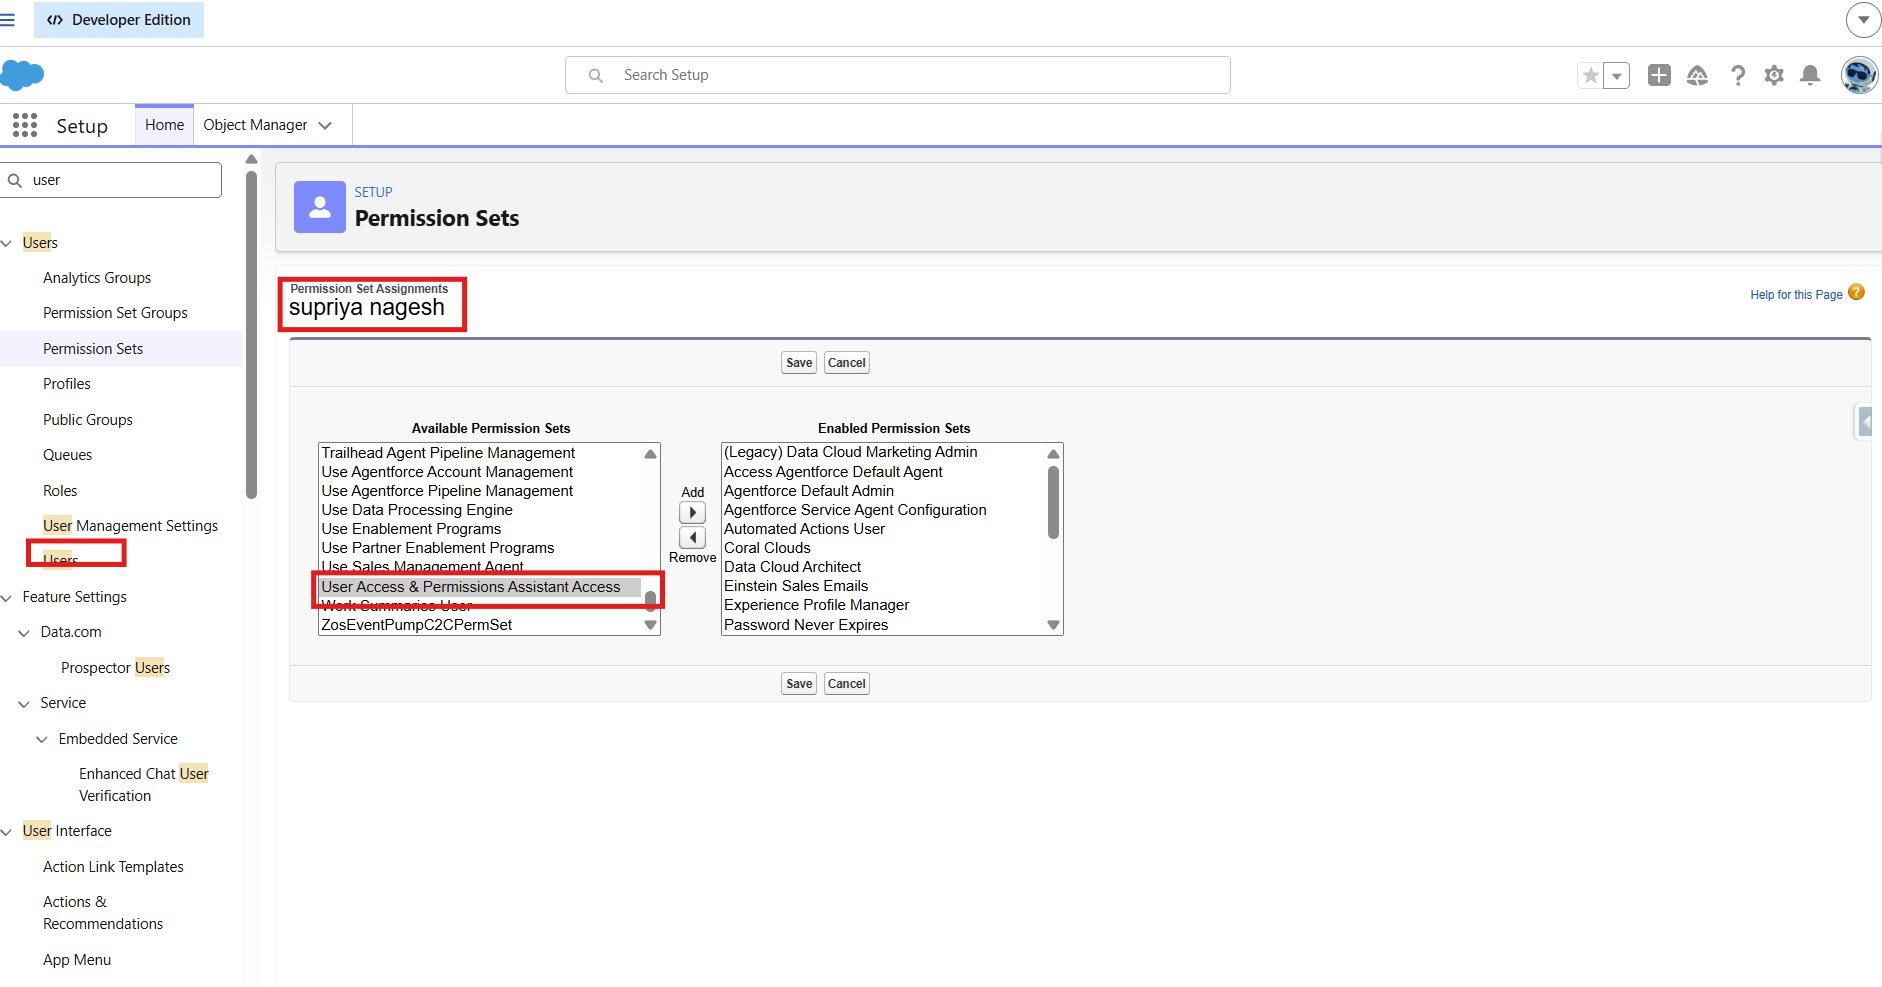
Assign the Helper App Access Permission Set
- API Enabled · Assign Permission Sets · Customize Application
- Manage Custom Permissions · Manage Profiles and Permission Sets
- Manage Session Permission Set Activations · View Roles and Role Hierarchy · View Setup and Configuration
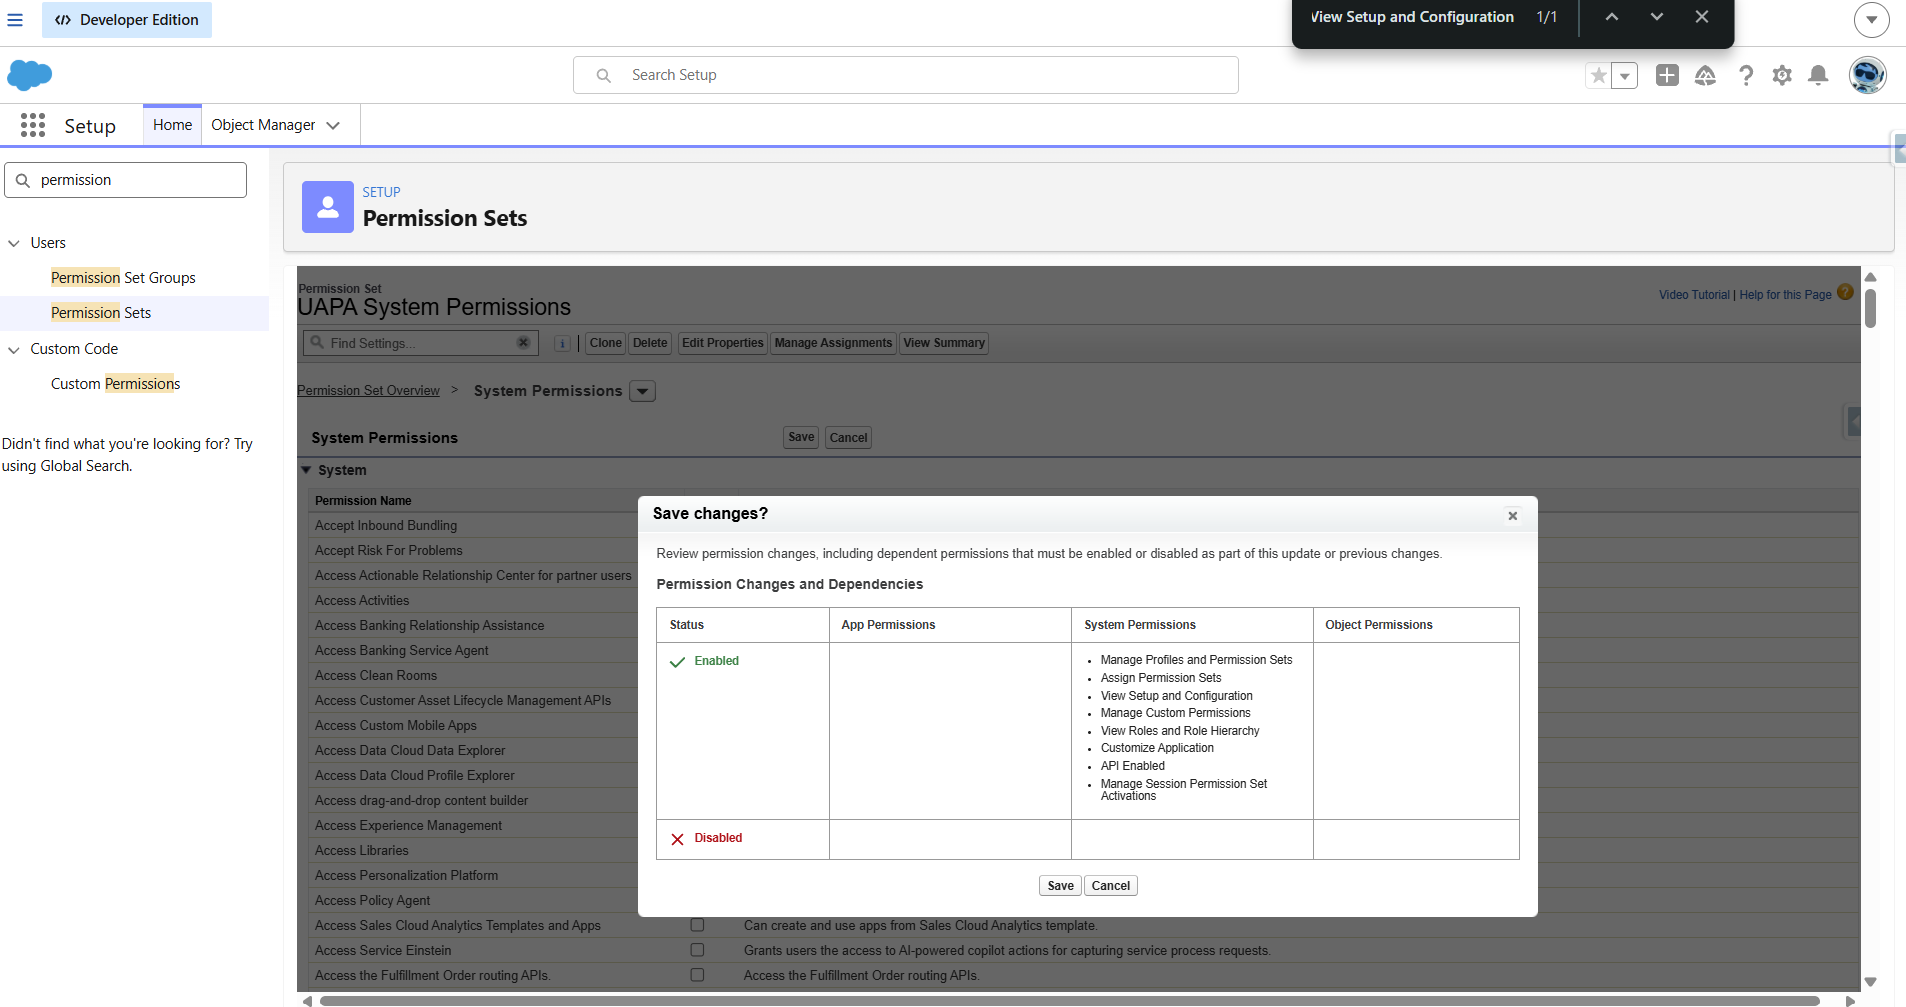
Verify required System Permissions
⚠️ Confirmed by testing, not documentation
In testing this myself, Manage Session Permission Set Activations was not checked on System Administrator by default — a genuinely useful reminder that even the most privileged standard profile in Salesforce isn't automatically complete for every newer permission. If you find gaps, build a Permission Set (UAPA System Permissions) with the missing ones enabled and assign it to yourself.
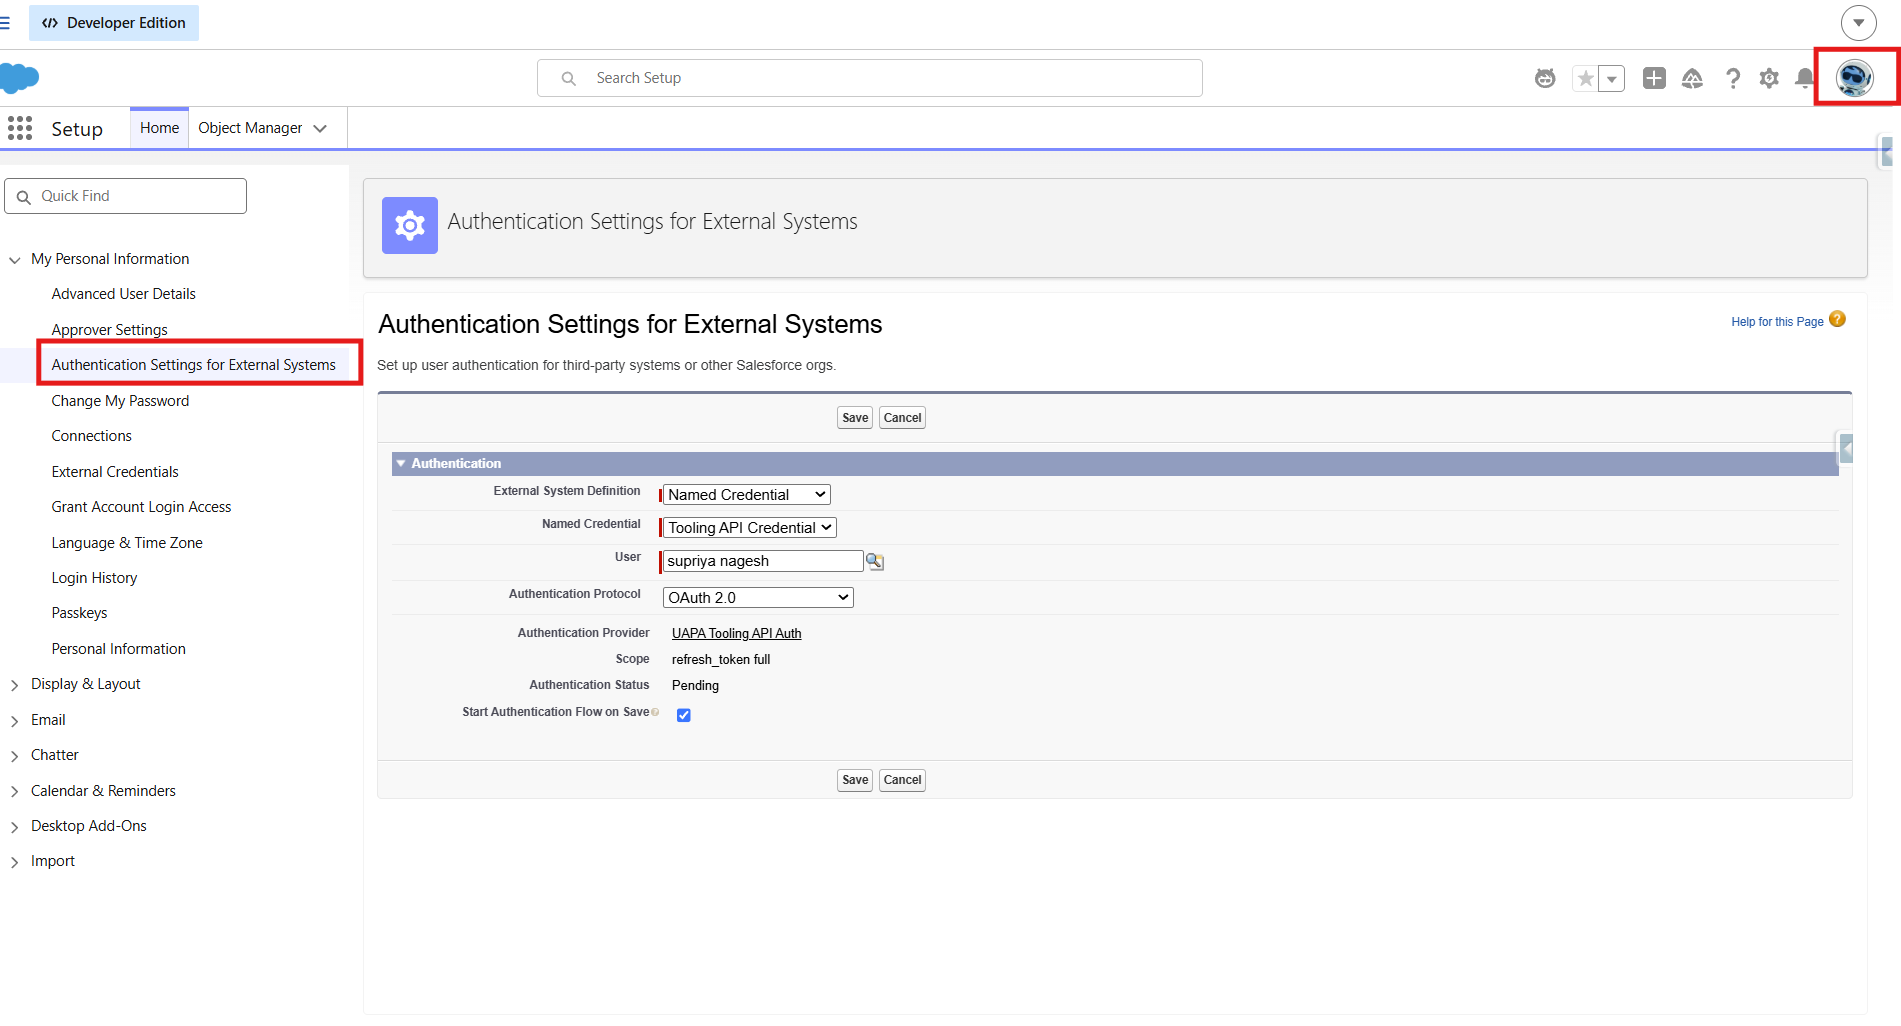
Set User Authentication for the Tooling API Credential
Putting it to work
Finding and Using the App
App Launcher → search "User Access and Permissions Assistant" — not Setup. This is an easy first stumble; the app is a Lightning app accessed like any other app, not a Setup configuration page.
Running the Converter
- Open the Converter tab
- Select your source Profile
- Run the conversion — a new Permission Set is generated automatically
What to check in the output
- Object and field permissions — should match what you'd expect from the source Profile
- Tab Settings and Record Type access — should be absent. This is Salesforce's own tool independently confirming these settings don't migrate, because they were never meant to
- Unexpected System/App permissions — if your source Profile was cloned from Standard User (or any Profile with a long history), expect the generated Permission Set to carry over defaults nobody explicitly reviewed. The tool converts what's present, not what's needed. That audit is still a manual step
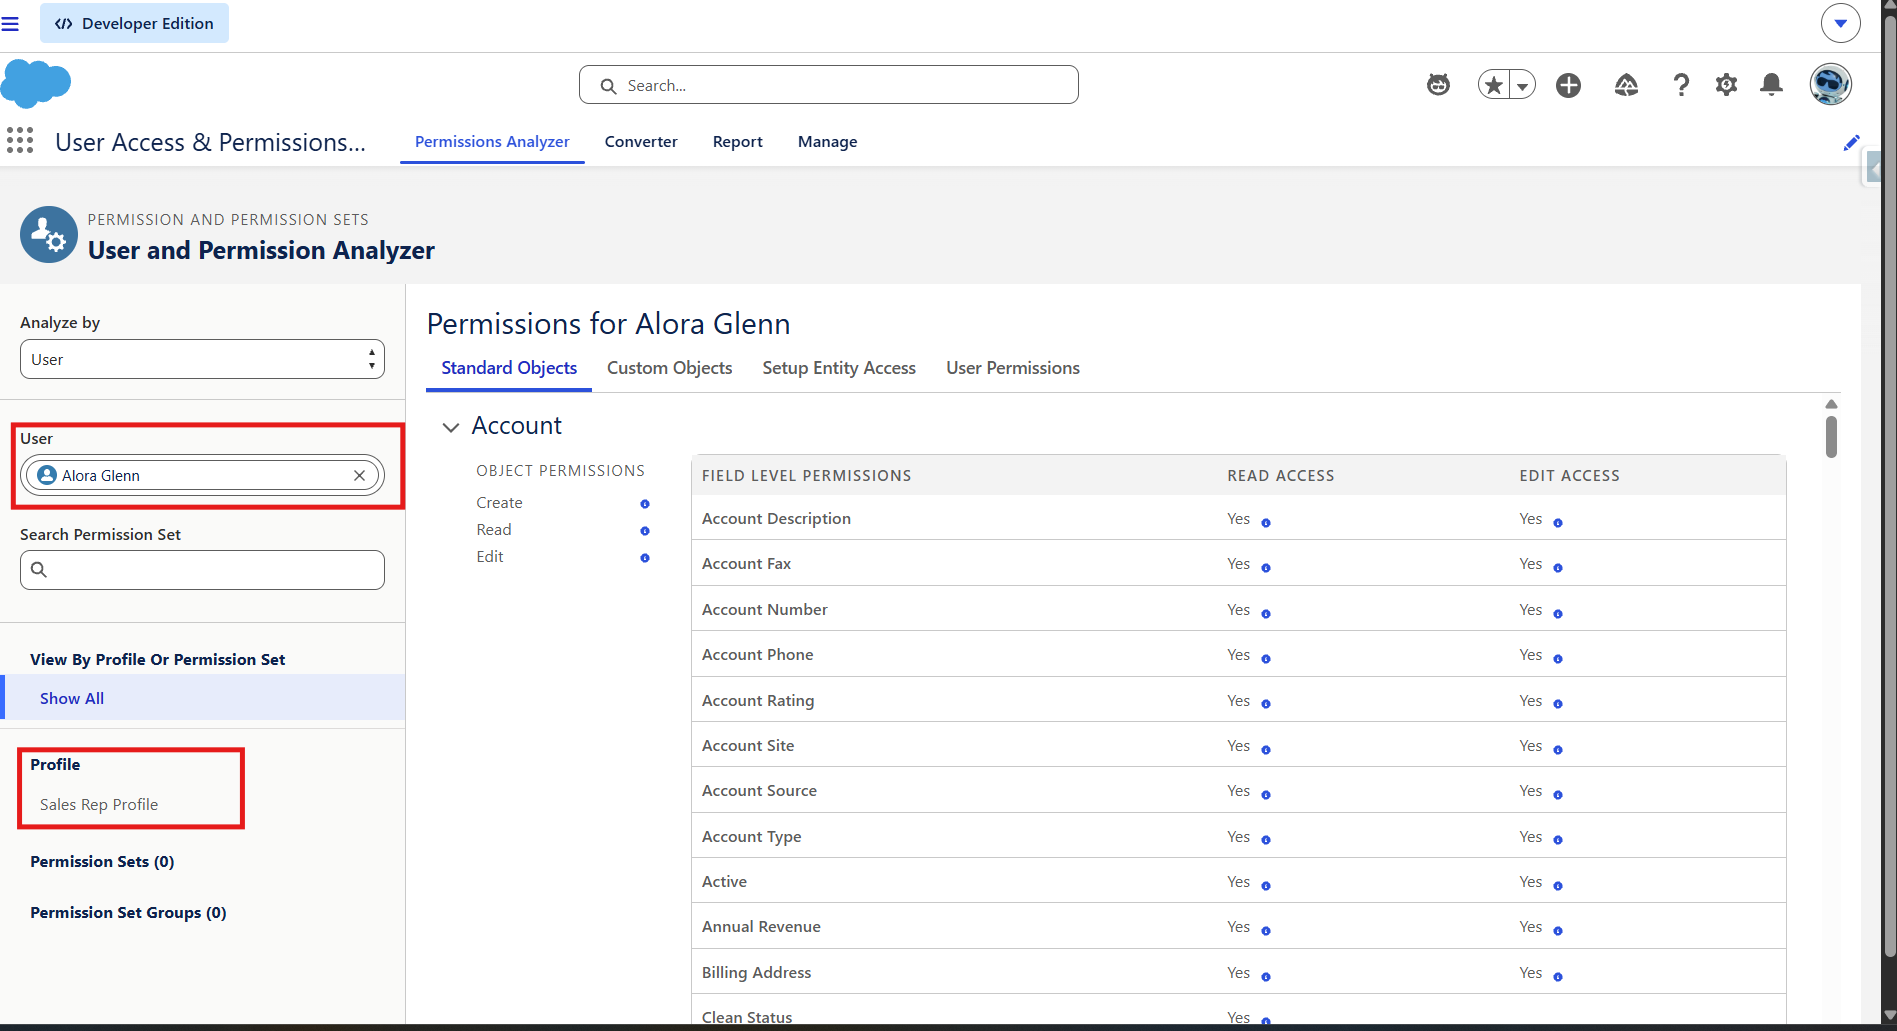
From Converter Tab select the desired Profile
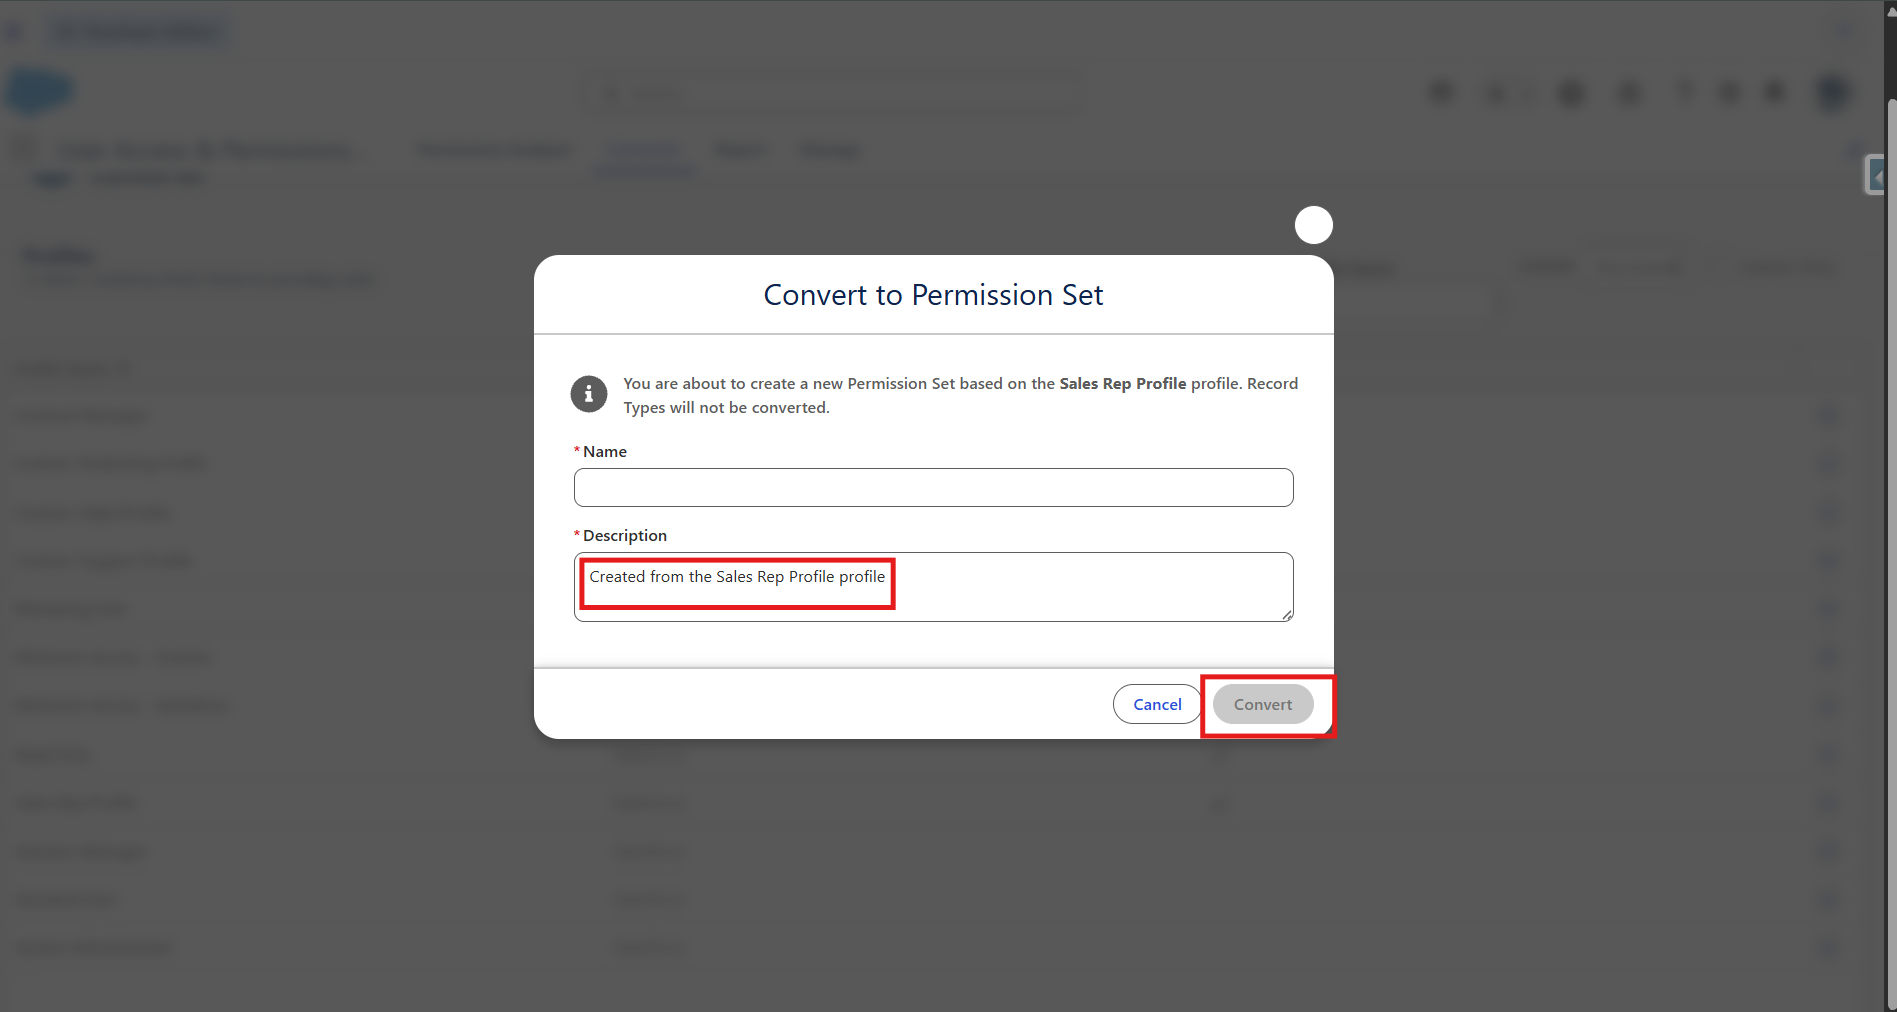
Click on the 'Convert to Permission Set' from the selected profile
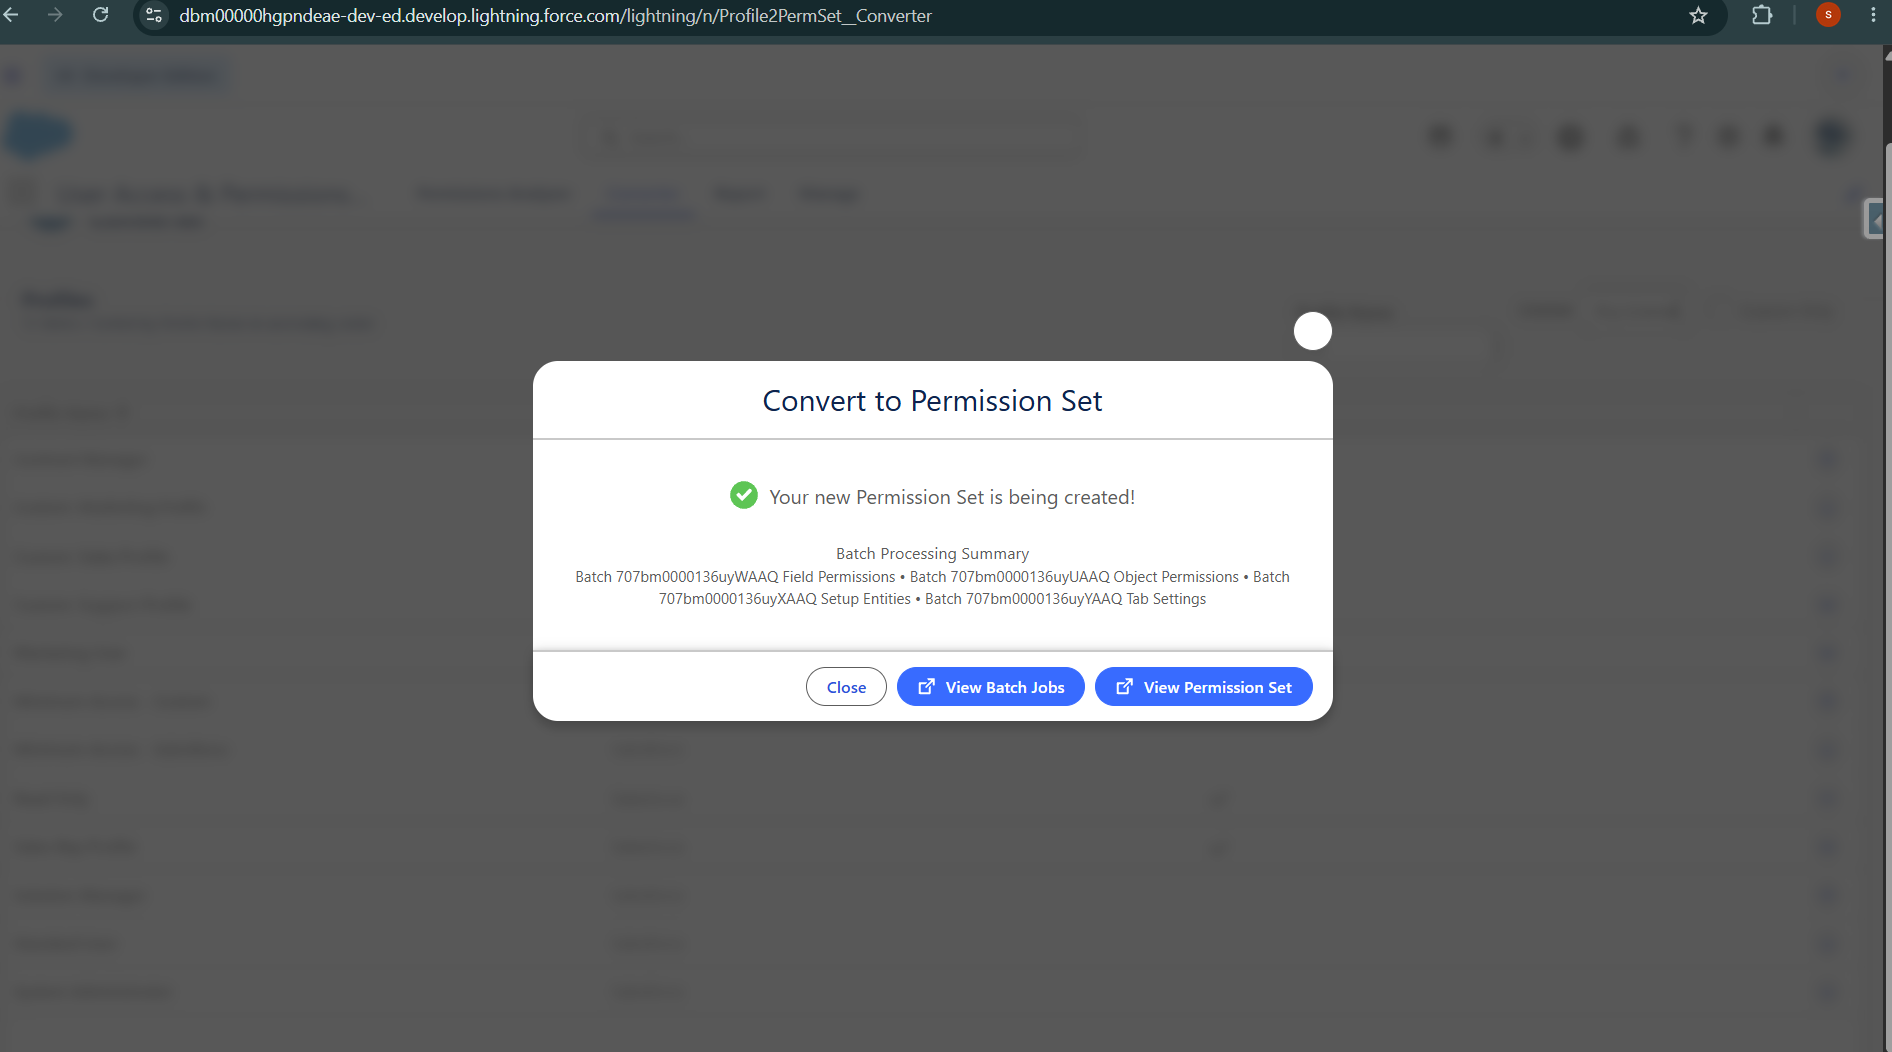
'Convert' the Profile into Permission Set
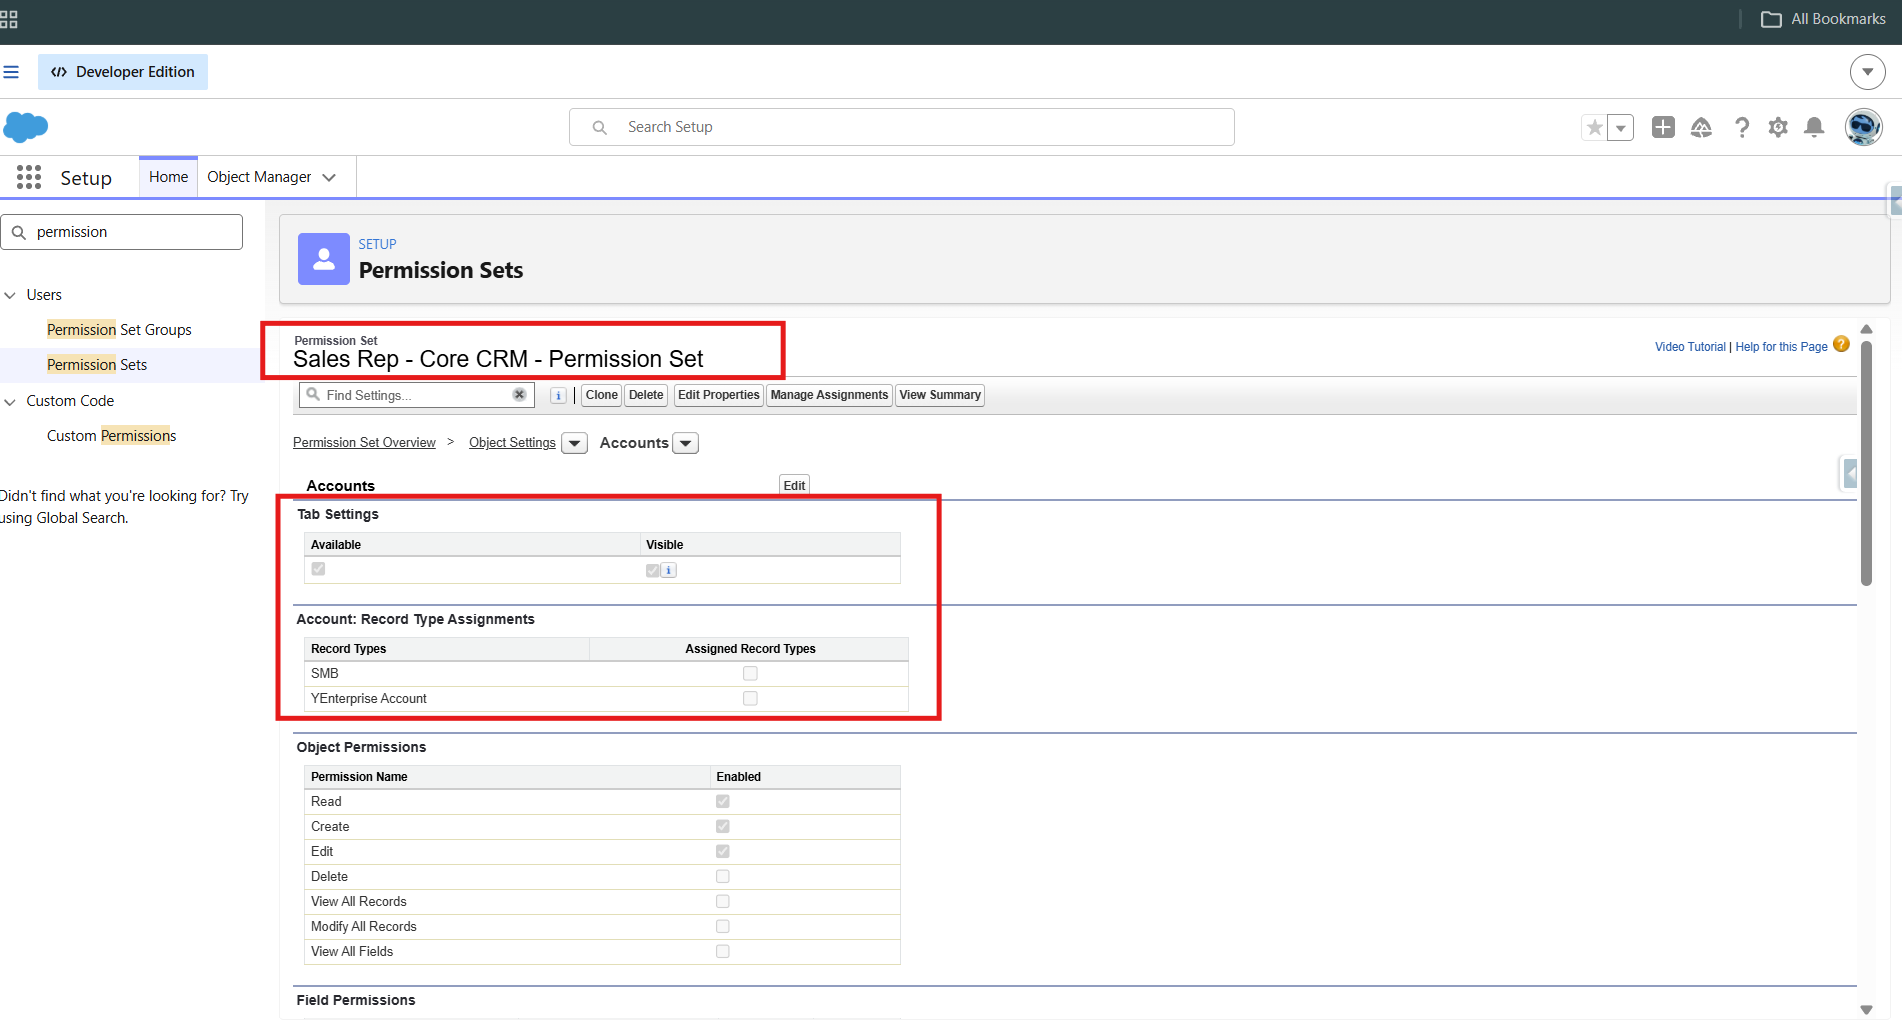
Tab settings and record type access is passed when converted but not the default settings
💡 Ties back to the main finding
The Converter independently confirms exactly what I found building the migration by hand: Tab Settings and Record Type access come through, but the things that never had a Permission Set home — Page Layout Assignment, Record Type defaults — simply don't appear in the output. Two different methods, same conclusion.
Quick Reference: Everything You'll Name
| Component | Suggested Name |
|---|---|
| Connected App | UAPA Tooling API |
| Authentication Provider | UAPA Tooling API Auth |
| Named Credential | Tooling API Credential (API name auto-fills: Tooling_API_Credential) |
| Permission Set (Named Credential access) | UAPA Tooling API Access |
| Permission Set (System Permissions, if needed) | UAPA System Permissions |
- Connected App created with placeholder callback URL, Full access + refresh_token scopes
- Authentication Provider created, Callback URL copied
- Connected App updated with the real Callback URL
- Named Credential created with exact required Name, Per User identity, correct Callout Options
- Permission Set granting Named Credential Access + Assigned Connected Apps, assigned to self
- If redirect_uri_mismatch appears — verified values match, then waited ~10 minutes before retrying
- App installed from AppExchange, Helper Permission Set assigned
- System Administrator's System Permissions verified, not assumed complete
- Authentication Settings for External Systems configured, flow completed cleanly
- Found the app via App Launcher, not Setup
- Converter run against source Profile, output cross-checked against the manual build
Closing
None of this setup is difficult in isolation — it's a standard OAuth Connected App / Auth Provider / Named Credential pattern that shows up elsewhere in Salesforce too. What makes it worth documenting is that the official steps are scattered across nine separate help articles with no single unified walkthrough, and one wrong callback URL paste is enough to stall the whole thing at Step 4 with a cryptic error and no obvious next move — except now you know it isn't actually a wrong value at all.
If you're doing the hands-on Profile-to-Permission-Set exercise, this tool is a genuinely useful second validation pass once you're set up — just budget 20–30 minutes for the OAuth plumbing before you get to the part that actually matters.
Read the main article
What to practice, why it's still worth doing without a forced deadline, and the two things that always need a Profile — confirmed both by manual testing and by this tool's own output.